pongbot-official-partner-webtennis24

First AI Tennis Robot

use code WT24 for a 5% discount
Slice Serve Made Simple: A Step-by-Step Tennis Lesson

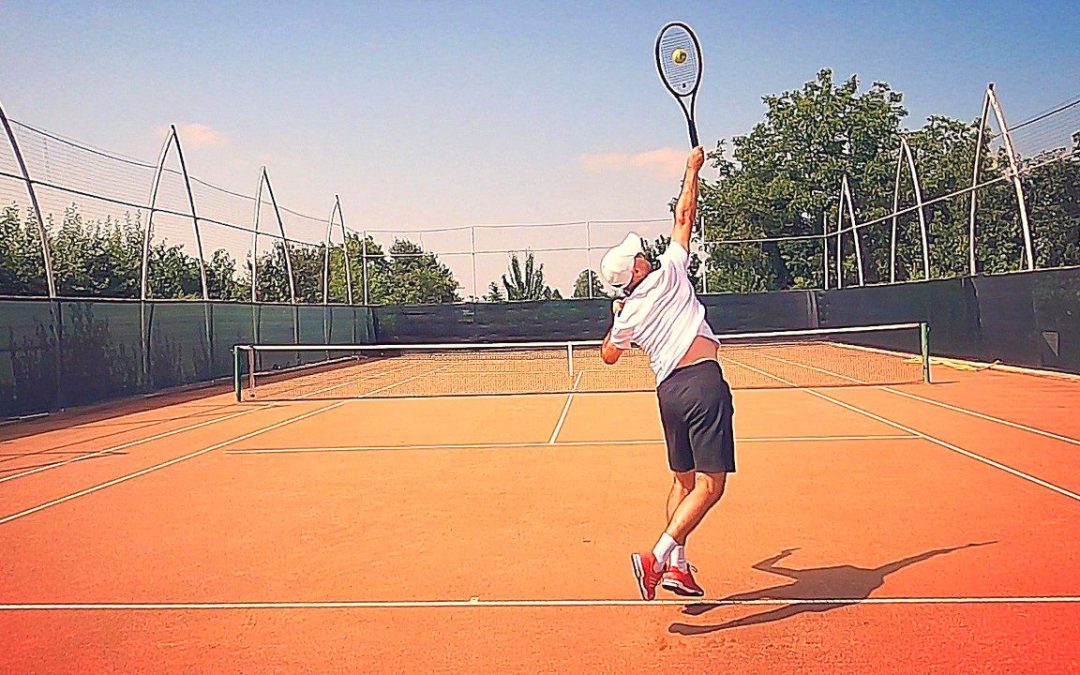
Slice Serve Made Simple: A Step-by-Step Tennis Lesson

How I teach the slice tennis serve, step by step

Teaching the slice tennis serve involves focusing on two main elements: the toss and the brushing motion. By simplifying the process and breaking it down into specific drills, players can develop a consistent and effective slice serve. Let’s dive into these elements and the drills that will help you teach (as a coach) or learn (player) the slice serve.

The 2 main elements of the tennis slice serve

The two critical components of a successful slice serve are:

  • Toss: The ball must be tossed slightly away from your body towards your dominant side.
  • Brushing motion: The racket must brush the back of the ball from left to right (for right-handed players) to create the desired side spin.

Practicing these elements is vital for developing an effective slice serve:

The 1st slice serve tennis drill: ball spin on the racquet

To start, you need to practice the brushing motion.
Hold the racket with a continental grip, choking up on it to gain better control. Begin by bouncing a ball on your racket while brushing the bottom of it. This drill helps you understand how to create spin by brushing the ball.
Focus on the motion and feel how the racket interacts with the ball.

The 2nd slice serve tennis drill: ball spin against the fence

Next, find a fence with a windscreen.
Stand close to it and press the ball against the windscreen using your racket. Move the racket side to side, rolling the ball against the fence. This motion mimics the brushing action you will use in your slice serve, helping you develop the necessary feel for the shot.

The 3rd slice serve tennis drill: roll and release

For this drill, position yourself near the net.
Choke up on your racket again, and press the ball against your palm before rolling it gently side to side. After a few rolls, move your racket away from you to let the ball fly forward, over the net. This motion simulates the brushing effect needed for a slice serve, helping you to develop muscle memory.

The 4th slice serve tennis drill: toss and control

Now that you have practiced the brushing motion, it’s time to add the toss.
Stand in your serving position and practice tossing the ball slightly to your right (for right-handed players). Focus on keeping the toss low and direct, with minimal spin. This will ensure a cleaner connection when you brush the ball on your serve.

The 5th slice serve tennis drill: toss and brush

Combine the toss with the brushing technique.
Start from the net and gradually move back to the service line. With each serve, toss the ball to your right and brush it from left to right. This drill helps you learn the rhythm and timing needed for an effective slice serve. Remember to keep your backswing abbreviated and focus on the toss and brush.

Slice serve tactical advantages

Utilizing a slice serve in tennis has several advantages:

  • The ball tends to stay low, making it difficult for the returner to send it back effectively.
  • As a right-handed player, serving from the right side can pull your opponent off the court, opening up the court for your next shot.
  • The spin generated by the slice can make it harder for opponents to control the ball, especially if you hit it with pace.

Many players, including top professionals, rely on the slice serve as a dependable option, especially for their second serves.

Slice Serve Tennis Technique

FAQ

What grip should I use for a slice serve?

The continental grip is recommended for a slice serve as it allows for better control and spin. The eastern backhand grip can also be used, for extra spin.

How can I improve my toss for the slice serve?

Practice tossing the ball slightly to your dominant side and keep the toss low to enhance your connection with the ball.

What should I focus on when practicing my slice serve?

Concentrate on your toss, brushing motion, and the follow-through to develop consistency and effectiveness in your serve.

How does the slice serve compare to other serves?

The slice serve is often used as a strategic option to pull opponents off the court, while flat serves are typically used for speed and power.

By practicing these drills and understanding the tactical advantages of the slice serve, you’ll be well on your way to mastering this essential tennis technique. Remember, consistency comes with practice, so keep working on your toss and brushing motion!

For more detailed lessons and tips, consider visiting WebTennis24 Training.


Cosmin Miholca

Cosmin Miholca

Certified Tennis Coach

Ready to improve your tennis further?
Let’s get started!

Why Offering Free Tennis Lessons Can Boost Your Coaching Business

Why Offering Free Tennis Lessons Can Boost Your Coaching Business


The Strategy of Free Coaching

As a tennis coach, attracting new clients can sometimes be a challenging task. However, one effective strategy that can help you bring in new players and spread the word about your services is to offer free tennis lessons. This article will explore the benefits of this approach, how to implement it, and why it can be a game-changer for your coaching business.

Table of Contents

The Concept of Free Lessons

Offering free lessons may sound counterintuitive, but it is a powerful marketing tool. By providing a no-cost opportunity for potential clients to experience tennis, you can showcase your coaching skills while creating a fun and engaging environment. This strategy not only increases visibility but also encourages word-of-mouth referrals.

Setting Up Your Free Lesson Day

To implement this strategy effectively, consider the following steps:

  • Choose a Regular Time: Set a specific day and time for your free lessons. Consistency is key, as it allows your current students to plan ahead and invite friends.
  • Invite Your Students: Encourage your existing students to bring along friends, family members, or anyone interested in learning tennis. This creates a friendly atmosphere and introduces new players to your coaching style.
  • Organize Fun Activities: Plan engaging drills and games that promote fun and competition. Activities like “Around the World” or “King of the Court” can be enjoyable for both beginners and experienced players.
  • Utilize Multiple Courts: If possible, use multiple courts to accommodate everyone. This allows for more participants and ensures that everyone gets a chance to play.
  • Foster a Welcoming Environment: Make sure to create a friendly and inclusive atmosphere. Encourage interaction between new players and your current students to help them feel comfortable.

Benefits of Offering Free Lessons

The advantages of providing free lessons extend beyond just attracting new clients. Here are some key benefits:

1. Increased Exposure

By offering free lessons, you are effectively marketing your services without any direct costs. This exposure can lead to increased interest in your coaching programs as more people learn about what you offer.

2. Building Community

These free sessions create a sense of community among players. Newcomers feel welcomed, and existing students enjoy sharing their passion for tennis with friends. This camaraderie can lead to lasting relationships and a loyal client base.

3. Positive Word-of-Mouth

When participants have fun and enjoy their experience, they are more likely to share their positive impressions with others. This word-of-mouth marketing can be incredibly effective, as personal recommendations carry significant weight.

4. Opportunity for Upselling

Once new players experience your coaching style and the fun of playing tennis, they may be more inclined to sign up for paid lessons. You can also offer special discounts or packages for those who attended the free session, incentivizing them to continue their tennis journey with you.

Implementing the Strategy

To get started with offering free lessons, follow these practical steps:

1. Promotion

Promote your free lesson day through various channels. Use social media platforms, local community boards, and word of mouth to spread the news. You can even create short promotional videos using FlexClip, an easy-to-use online video maker that helps coaches design engaging clips to showcase their events and attract more participants.
Make sure to highlight the fun activities planned for the day to attract interest.

2. Prepare Your Materials

Ensure you have enough equipment, such as rackets and balls, for all participants. Prepare drills and games in advance so that the day runs smoothly and everyone is engaged.

3. Follow Up

After the session, follow up with participants. Thank them for coming and invite them to join future lessons. You can also gather feedback to improve future events and tailor your offerings to meet their needs.

Conclusion

Offering free tennis lessons is a fantastic way to attract new clients and generate buzz around your coaching services. By creating an enjoyable environment and encouraging your current students to invite friends, you can expand your reach and build a community of tennis enthusiasts. Remember, the more fun you make it, the more likely participants are to return for paid lessons and share their experiences with others.

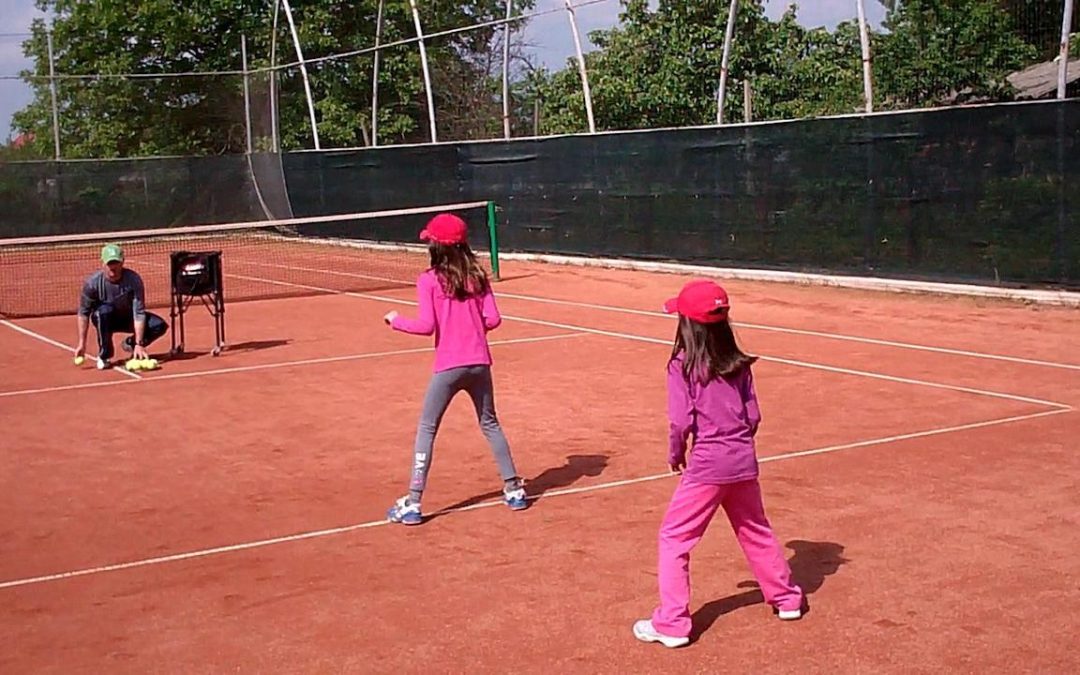
fun tennis class

FAQ

How often should I offer free lessons?

Consider offering free lessons weekly or bi-weekly to maintain interest and engagement. Consistency helps build a routine for participants.

What age groups can participate?

Free lessons can be tailored for all age groups. Ensure that activities are suitable for various skill levels and ages to maximize participation.

How can I measure the success of my free lessons?

Track attendance numbers, gather feedback from participants, and monitor how many convert to paid lessons. This data will help you assess the effectiveness of your strategy.

What types of games work best for free lessons?

Games that encourage teamwork and competition, such as “King of the Court” or relay races, are great options. They keep players engaged and promote a fun atmosphere.

For more tips and resources on improving your tennis coaching, check out the Tennis Coaching section from WebTennis24.


Cosmin Miholca

Cosmin Miholca

Certified Tennis Coach

Ready to improve your tennis further?
Let’s get started!

How to Serve Using a Continental Grip in 6 Easy Steps

How to Serve Using a Continental Grip in 6 Easy Steps


Serving with a Continental Grip: A Step-by-Step Guide

The serve is one of the most crucial elements of tennis, setting the tone for every point played. One of the most effective ways to serve is by using the continental grip.

While it can be challenging for beginners, learning to serve with this grip can lead to greater power and spin on the serves. In this guide, we’ll break down various drills that will help you or your student become proficient in serving with the continental grip.

Table of Contents

How to Serve With Continental Grip

Before diving into drills, it’s essential to understand the continental grip itself. Often referred to as the “hammer grip,” it allows for a versatile range of shots, including volleys, slices, and serves. The grip might feel awkward at first, but with practice, it becomes second nature.

First Drill: Understanding Pronation

The first step in mastering the continental grip is understanding pronation, which is the inward rotation of the forearm. This movement is crucial for delivering an effective serve. To illustrate this, consider giving a high five. Start with your palm close to your ear and, as you move your hand to meet someone else’s palm, rotate your wrist inward just before contact. This is the essence of pronation.

Second Drill: High Five / Palm to the Fence

Now that your student understands the concept of pronation, it’s time to incorporate it into the drill. This drill reinforces the high five motion:

  • Have your student stand sideways next to a fence.
  • Instruct them to hold their palm up, close to their ear.
  • As they swing their hand toward the fence, they should start with the edge of their palm facing up and turn it inward just before contact.

This exercise helps them visualize the swing and prepares them for actual ball contact later on.

Third Drill: High Five / Racket to the Fence

This drill builds on the previous one by emphasizing the high five motion with the racket while aiming at the fence.

  • Position the student close to the fence with the racket held in the continental grip.
  • Instruct them to swing the racket up, maintaining the edge first position, and then rotate the racket just before it makes contact with the fence.

This repetition will help solidify the muscle memory required for an effective serve.

Fourth Drill: Double L / High Five Ball Contact

In this drill, we will introduce the ‘Double L’ position, which is critical for serving. This position involves creating two L shapes: one between the upper arm and forearm, and another between the racket and forearm.

  • Have your student hold the racket in the Double L position, with the strings near their ear.
  • As they toss the ball up, they should swing up with the edge of the racket, performing the high five motion just before making contact.

Encourage them to visualize the high five with the ball, reinforcing the importance of pronation. There is no follow-through at this stage; just practicing pronation and ball contact.

Fifth Drill: Add the Follow-Through

After your student feels comfortable with the previous drills, it’s time to add the follow-through to their serve. This step is crucial for generating extra power.

  • Instruct them to maintain the Double L position.
  • As they toss the ball, they should perform the high five motion and then continue the swing into a follow-through, ensuring their racket completes the motion.

This drill helps them understand the complete motion of serving, from preparation to execution.

Sixth Drill: Full Swing

The final drill combines everything learned so far into a full serve. This is where your student will put all the pieces together.

  • Have them stand at the service line, holding the racket in the continental grip.
  • Instruct them to toss the ball into the air and perform a complete swing, emphasizing the edge-first, contact and the follow-through.

Remind them to focus on pronation throughout the swing, ensuring they turn their racket just before ball contact. This will lead to a more powerful serve.

Ready to serve / tennis blog article

Frequently Asked Questions (FAQ)

What is the continental grip?

The continental grip is a way of holding the racket that allows for versatility in shots, especially serves. It involves positioning the base knuckle of the index finger on the second bevel of the racket handle.

Why is pronation important in serving?

Pronation allows for a more effective and powerful serve, generating spin and control. It is a crucial movement that enhances the quality of your shots.

How long will it take to master the continental grip?

Mastery varies by individual, but consistent practice using the drills outlined above will lead to gradual improvement. Patience and persistence are key.

Can I use the continental grip for other shots?

Yes! The continental grip is not only beneficial for serves but also for volleys, slices, and overhead shots, making it a fundamental grip in tennis.

What if I struggle with the continental grip?

It’s common for beginners to find the continental grip awkward. Focus on the drills, and with time, it will become more comfortable. Consider working with a coach for personalized guidance.

Mastering the continental grip can transform your serving game, allowing for greater control and power. By following these drills, you’ll be well on your way to becoming an adept server, ready to take your tennis skills to the next level. For more detailed tennis lessons and drills, check out Visual Tennis Lessons and Progression Drills.


Cosmin Miholca

Cosmin Miholca

Certified Tennis Coach

Ready to improve your tennis further?
Let’s get started!

My Step-by-Step Approach to Teaching Tennis VOLLEY to Beginners

My Step-by-Step Approach to Teaching Tennis VOLLEY to Beginners

A Comprehensive Guide for Teaching the Volley to Beginner Tennis Players

Table of Contents

Intro and greeting the student

Welcome to your tennis journey! Today, we’re diving into one of the most exciting shots in tennis—the volley. As a coach, it’s essential to create a welcoming environment for your student. In this lesson, we’ll explore the fundamentals of the volley, starting with hand-eye coordination and progressing through various drills and techniques.

Hand-eye coordination drills

Before we jump into volleys, we need to ensure our students have good hand-eye coordination. Start with simple drills: toss and catch a ball with your student. This exercise not only warms them up but also builds the necessary skills for volleying.

Encourage your student to smile and enjoy the process. As they toss and catch, remind them to shuffle from side to side, creating movement and rhythm. This drill lays the foundation for the upcoming volley techniques.

Racket and ball control with continental grip

Next, introduce the continental grip, often referred to as the “hammer grip.” This grip is crucial for effective volleying. Have your student hold the racket as if they’re hammering a nail, which will help them control the racket better.

To practice, have them bounce the ball on the strings of the racket, encouraging them to develop strength in their wrists and forearms. This exercise may be challenging initially, but it’s essential for their progression.

Why you should use softer balls when teaching the volley

Using softer, lighter balls is vital when teaching volleys, especially for beginners. These balls are easier to control and less intimidating, allowing your student to focus on technique without the fear of getting hit. They provide the opportunity to practice without overwhelming the student.

Cone exercise to learn hand-eye coordination

For the next drill, grab some cones. Have your student hold a cone facing them and toss balls for them to catch in the cone. This fun exercise enhances their hand-eye coordination and prepares them for the next steps in volleying.

Encourage them to catch the ball in the air rather than letting it bounce, as this mimics the volleying action they will soon learn.

Tennis volley introduction: what it is, where we hit it, and why

Now that we’ve warmed up, let’s define the volley. A volley is a shot played when you’re close to the net, and you hit the ball before it bounces. This shot is crucial for finishing points and controlling the game.

Explain to your student that volleys are typically hit inside the service line, emphasizing the importance of being proactive and stepping into the shot.

Volley grip: how to, and why hammer/continental grip is the best

Reiterate the importance of the hammer grip for volleys. This grip allows for quick reactions without the need to change grips between forehand and backhand volleys. It simplifies the process, making it easier for beginners to learn.

Coach demonstrates the forehand and backhand volley

As the coach, demonstrate both the forehand and backhand volleys clearly. Show your student how to catch the ball with minimal backswing and follow-through. Emphasize that the volley is more about placement rather than power.

Tennis drill: ball “catching” technique

Introduce the “catching” technique. Have your student practice catching the ball with their hand first, focusing on the timing and positioning. Once they feel comfortable, transition to using the racket. Remind them that the goal is to catch and push the ball, not swing at it.

Hammer grip vs forehand grip

Discuss the differences between the hammer grip and the forehand grip. Highlight that the hammer grip is more advantageous for volleying due to its versatility and simplicity. Reinforce the idea that using one grip for both forehand and backhand volleys will help them react faster.

Hammer grip / ball “catching” drills, and technique tips

Have your student practice the hammer grip while catching balls. Encourage them to maintain a firm wrist and a 90-degree angle between the forearm and the racket. This technique will help them develop strength and control.

Wrist control tips: 90 degree angle

Wrist control is crucial for effective volleying. Remind your student to keep their wrist locked and maintain that 90-degree angle between the forearm and racket. This position ensures better control and accuracy when hitting the ball.

Ball “catching” with full racket and hammer grip

As your student becomes more comfortable, have them practice catching balls with the full racket using the hammer grip. This exercise reinforces the concept of catching and pushing rather than swinging. Encourage them to focus on the ball’s placement over power.

Introduction to backhand volley: grip, technique

Now it’s time to introduce the backhand volley. Use the same hammer grip and emphasize that the technique is similar to the forehand volley. Demonstrate the backhand volley, focusing on catching the ball out in front and keeping the racket face slightly open.

Volley technique error: elevating the elbow (how to fix)

Common errors include elevating the elbow during the volley. Teach your student to keep their elbow down to maintain control. A great drill to correct this is holding a ball between their elbow and body to keep the elbow tucked in.

Fence drill to avoid the backswing

Use a fence to help your student understand the importance of not taking the racket back. Have them practice catching balls while standing close to the fence to ensure their racket stays in front of their body. This drill emphasizes the no-backswing principle of volleying.

Chair drill: avoid pushing the ball down / learn to pop the ball up by opening the racket

Introduce a chair drill where your student sits and practices volleying. This helps them focus on opening the racket face and popping the ball up rather than pushing it down. It’s a great way to reinforce the technique in a controlled manner.

Basic volley drill: one step forward / one step backward

In this drill, have your student practice stepping forward to meet the ball and then stepping back to regain position. This drill helps them understand the importance of footwork and positioning while volleying.

Basic volley drill: forehand and backhand “catching and pushing” the ball

Combine forehand and backhand volleys in a simple drill where your student catches and pushes the ball over the net. Reinforce the idea of using the hammer grip and maintaining the correct wrist angle throughout the drill.

Lesson review

After practicing, take a moment to review the key concepts covered in the lesson. Emphasize the importance of the hammer grip, wrist control, and the no-backswing technique. Encourage your student to practice these skills regularly for improvement.

Volley ready position: technique, split step

Introduce the ready position for volleying. Explain the importance of the split step to maintain balance and prepare for quick reactions. The ready position should have the racket in front and the elbows slightly out to allow for quick movement.

Elbows position technique: why it is important that elbows are out in front

Reiterate that having the elbows out in front helps prevent the racket from dropping too low, allowing for better control and power. Encourage your student to keep their elbows in the correct position during volleys.

Basic volley footwork, and overall technique (no balls)

Practice the footwork necessary for volleying without balls. This helps your student focus on movement and positioning. Emphasize the importance of stepping out to load weight and stepping in to hit the ball.

Ball feeding / volley technique practice (with balls)

Now it’s time for ball feeding. Feed balls to your student while they practice their volleys. Remind them to maintain the correct grip, angle, and footwork while catching and pushing the ball.

Backhand volley technical aspects: back elbow, basic footwork, follow-through, hands separation (tennis tips, drills)

Focus on the technical aspects of the backhand volley, including the back elbow positioning and footwork. Reinforce the idea of not following through and instead emphasizing catching and pushing the ball.

Backhand volley technique practice (with balls)

Allow your student to practice backhand volleys with balls. Remind them to focus on the key techniques discussed, including grip, footwork, and wrist control.

Forehand and backhand volley technique practice (with balls)

Continue practicing both forehand and backhand volleys with balls. Use positive reinforcement to encourage your student as they improve their technique and confidence on the court.

Review of the volley technical elements learned and practiced / difference between volley and other tennis strokes

Finally, wrap up the lesson by reviewing all the technical elements learned. Discuss the differences between volleys and other strokes, highlighting the unique aspects of volleying that make it an essential skill in tennis.

Volley Tennis / Coaching Lesson for Beginning Players

FAQ

  • What is the best grip for volleying? The continental or hammer grip is best for volleying as it allows for quick reactions and simplifies the technique.
  • Why should I use softer balls when teaching volleys? Softer balls are easier to control and less intimidating for beginners, helping them focus on technique rather than power.
  • How can I improve my hand-eye coordination for tennis? Regular practice with tossing and catching drills can help enhance your hand-eye coordination, which is crucial for volleying.
  • What is the most important aspect of volleying? The most important aspects are maintaining the correct grip, keeping the racket face slightly open, and focusing on catching and pushing the ball rather than swinging.

 

Cosmin Miholca

Cosmin Miholca

Certified Tennis Coach

Ready to improve your tennis further?
Let’s get started!

Essential Tips for Aspiring Tennis Coaches

Essential Tips for Aspiring Tennis Coaches

Career-Boosting Tips for Young Tennis Coaches

Starting a career as a tennis coach can be both exciting and challenging. For young coaches, the journey is often filled with learning experiences that can shape their approach and effectiveness. Here are two invaluable tips that can help elevate your coaching skills and set you on the right path.

Table of Contents

1. Learn from the Best

The first step to becoming a better coach is to surround yourself with experienced professionals. Finding a top tennis coach in your area and offering to work for them for free or as a volunteer can be a game-changer. This approach not only allows you to gain hands-on experience but also provides invaluable insights into the nuances of coaching.

When I started my coaching career, I took this step, and it made a significant impact on my development. Working alongside a seasoned coach helped me clarify many questions I had about tennis coaching. The best part? Most experienced coaches are more than willing to share their knowledge and answer your questions, especially if they see your enthusiasm and willingness to learn.

How to Approach a Top Coach

  • Do Your Research: Identify the best coaches in your area. Look for those with a strong track record and positive reputation.
  • Make the Offer: Approach them politely and express your interest in learning. Offer your help with lessons, practice sessions, or any tasks they may need assistance with.
  • Be Proactive: Once you start volunteering, be observant and take notes. Ask questions when appropriate to deepen your understanding.

This experience can provide you with a wealth of knowledge that you won’t find in textbooks or online courses. The practical insights you gain will be instrumental in shaping your coaching philosophy and methods.

2. Invest in Private Lessons

If volunteering isn’t feasible for you, consider investing in private lessons with top professionals. This option allows you to learn directly from experienced coaches in a structured setting. During my early days, I scheduled private lessons with some of the best coaches in my area, and it was a game-changer for my development.

When you book these lessons, be clear about your intentions. Let the coach know that you’re not just there for a typical lesson; instead, you want to learn from their expertise. This transparency can lead to a more focused and beneficial session.

Preparing for Your Private Lessons

Before your lessons, take the time to prepare a list of questions or topics you want to discuss. This preparation will ensure that you make the most of your time with the coach. Here are some tips on how to prepare:

  • Identify Your Goals: Determine what specific areas you want to improve in your coaching skills.
  • Prepare Questions: Create a list of questions that address your concerns or areas where you seek clarification.
  • Be Open to Feedback: Approach the session with an open mind. Be ready to receive constructive criticism and adapt your methods accordingly.

By investing in your development through private lessons, you can gain insights that will enhance your coaching abilities and help you connect better with your students.

Conclusion

Becoming a successful tennis coach requires dedication, a willingness to learn, and a proactive approach. By seeking mentorship from experienced coaches and investing in private lessons, you can accelerate your growth and effectiveness as a coach. Remember, the journey of coaching is not just about developing future stars; it’s also about instilling a love for the sport in your students. Embrace the process, enjoy coaching, and watch your skills flourish!

2 Tips for Young Tennis Coaches

FAQ

What should I look for in a mentor coach?

Look for a coach with a strong reputation, proven results, and a coaching style that resonates with you. It’s important that they are open to sharing their knowledge and willing to invest time in mentoring you.

How much should I expect to pay for private lessons?

Prices can vary widely depending on the coach’s experience and location. Typically, you can expect to pay anywhere from $50 to $200 per hour. Consider it an investment in your career.

How can I find a coaching mentor?

Network within your local tennis community, attend coaching clinics, and reach out to coaches you admire. Don’t hesitate to express your interest in learning from them.

Is volunteering really beneficial for my coaching career?

Absolutely! Volunteering provides hands-on experience, helps you build connections in the tennis community, and allows you to gain insights that are crucial for your development as a coach.

What if I can’t find a mentor or private lessons in my area?

If local options are limited, consider online coaching courses and webinars. Many experienced coaches offer digital resources that can help you improve your skills from anywhere.

Cosmin Miholca

Cosmin Miholca

Certified Tennis Coach

Ready to improve your tennis further?
Let’s get started!

Drive Volley Tennis Lesson: Technique, Tactics, Drills

Drive Volley Tennis Lesson: Technique, Tactics, Drills

Table of Contents

What, where, and when to hit a drive volley in tennis 🎾

The drive volley is a unique shot in tennis, combining elements of both groundstrokes and volleys. Essentially, it’s like a groundstroke that you take in the air, without letting the ball bounce. This shot is typically executed when you find yourself around the service line or slightly further back. The key is to recognize the opportunity to hit a drive volley, especially when your opponent is out of position.

For instance, if your opponent is struggling to return a wide ball and is off the court, it’s your chance to take the ball early and redirect it into the open space. This not only puts pressure on your opponent but often results in an easy putaway shot. The topspin generated from hitting the ball in the air can also give the shot more power and control as it bounces.

Technical details of the drive volley

When executing a drive volley, it’s essential to use the correct grip. Unlike the continental grip used for volleys at the net, you should hold the racket with a groundstroke grip, either eastern or semi-western. This grip allows for more topspin and control.

As you prepare to hit, focus on a short backswing and aim to make contact at shoulder level. This ensures that you maintain control of the shot while generating power. Practicing this technique will help you become more comfortable with hitting the ball in the air.

Drive volley basket tennis drills

To develop your drive volley skills, start with basket-fed drills. Begin by hitting balls fed to you at mid-court, focusing on taking them in the air. This drill helps you get the feel for the shot without the pressure of a rally. Here’s a simple progression:

  • Start by hitting balls in the air from the service line.
  • Gradually increase the difficulty by rallying balls back to your partner.
  • On the third ball, step forward and execute the drive volley.

These drills will build your confidence and technique, making you more effective during match play.

Drive volley rally tennis drills

Once you’re comfortable with basket-fed drills, you can incorporate the drive volley into rally situations. Here’s a drill to try:

  • Begin at the service line and rally with your partner.
  • After two groundstrokes, step forward on the third ball and hit a drive volley.

This drill mimics match conditions and helps you practice recognizing when to take control with the drive volley. The aim is to develop your timing and decision-making skills, essential for using this shot effectively in a game.

More basket-fed tennis drills for drive volley and court transition

In addition to the above drills, you can also work on your court transition while practicing your drive volley. Here’s a suggested drill:

  • Start behind the baseline and hit two groundstrokes.
  • On the third shot, step inside the service line and execute a drive volley.
  • Repeat this on both forehand and backhand sides to ensure balanced practice.

This drill not only enhances your drive volley technique but also helps you practice moving forward into the court, which is crucial for maintaining pressure on your opponent.

tennis coaching: how to hit a drive volley

FAQ ❓

What is a drive volley?

A drive volley is a shot that combines elements of both a groundstroke and a volley. It’s executed in the air, typically from around the service line, and is aimed at taking advantage of openings in your opponent’s positioning.

When should I use a drive volley?

You should consider using a drive volley when your opponent is out of position, and the ball is coming towards you at a height that allows for a clean strike. It’s an aggressive shot that can lead to easy points if executed correctly.

What grip should I use for a drive volley?

Use a groundstroke grip, such as an eastern or semi-western grip, rather than the continental grip typically used for volleys at the net. This grip allows for better topspin and control.

How can I practice my drive volley?

Start with basket-fed drills, then move to rally drills where you incorporate the drive volley after two groundstrokes. Transitioning from the baseline to the service line while practicing will also help improve your overall game.

For more detailed coaching resources, check out Tennis Coaching Courses / Drills, Lesson Plans, Coaching Courses.


Cosmin Miholca

Cosmin Miholca

Certified Tennis Coach

Ready to improve your tennis further?
Let’s get started!

Improve Your Tennis Serve with These 3 Toss Drills

Improve Your Tennis Serve with These 3 Toss Drills

Improving your serve in tennis begins with a consistent and effective toss. A well-executed toss can elevate the overall quality of your serve, helping players to achieve better balance and confidence. In this article, we will explore three essential serve toss tennis drills that are particularly beneficial for beginners. These drills will help players develop a reliable toss, which is crucial for mastering the serve.


Table of Contents


Understanding the Importance of the Toss

The serve is one of the most complex strokes in tennis, and the toss is an essential part of it. As a coach, I emphasize the significance of the toss when teaching beginners. The following drills will help players grasp the concept and execution of a proper toss.

Tennis player serving

Photo by Gonzalo Facello on Unsplash


Drill 1: Lifting the Ball

The first drill focuses on lifting the ball rather than throwing it. This distinction is crucial for beginners to understand. For this drill, players should aim to lift the ball with minimal spin, which encourages them to avoid flicking their wrist or using their fingers excessively.

To perform this drill:

  1. Have the player get into the serve-ready position.
  2. Instruct them to lift the ball straight up while keeping their eyes on it.
  3. Encourage them to feel the lift, ensuring that the ball spins as little as possible.

This drill helps players develop a feel for lifting the ball correctly, setting a solid foundation for their serve.


Drill 2: Proper Release

The second drill (see the video above) aims to teach players about the timing of the release. Many beginners release the ball too early, causing inconsistency in their toss. This drill encourages players to maintain their arm extension after releasing the ball.

To execute this drill:

  1. Have the player lift the ball as in the first drill.
  2. Instruct them to hold their arm extended towards the sky after releasing the ball.
  3. Encourage them to keep their arm up until they hear the ball bounce.

This exercise promotes balance and proper posture, allowing players to wait for the ball to descend before striking it. It mirrors the technique of professional players who maintain arm extension until the ball is ready to be hit.

Tennis serve arm extension

Photo by Moises Alex on Unsplash


Drill 3: The Toss Landing Spot

The third drill emphasizes the ideal landing spot for the tossed ball. It is important for players to understand where the ball should ideally land in relation to their body. To help them visualize this, you can use a pyramid of balls placed ahead of the tip of their front foot.

To conduct this drill:

  1. Set up a small pyramid of balls about a foot in front of the player’s front foot.
  2. Instruct the player to toss the ball and aim for it to land on the pile of balls.
  3. Encourage them to adjust their toss until they can consistently land the ball on the pyramid.

This drill reinforces the concept of toss placement and helps players develop muscle memory for where their ball should ideally land (if letting it drop).


Recap of Key Drills

These three drills are designed to help beginning players develop a solid serve toss foundation:

  • Drill 1: Lifting the Ball – Focus on a minimal spin.
  • Drill 2: Proper Release – Maintain arm extension after release.
  • Drill 3: The Toss Landing Spot – Aim for the desired landing area.

Incorporating these drills into practice sessions can lead to significant improvements in a player’s serve. Consistency in the toss will eventually translate to better serves, increased confidence, and overall performance on the court.


Frequently Asked Questions (FAQ)

Q1: Why is the toss so important in tennis serves?

A: The toss is crucial because it sets the stage for the entire serve. A consistent toss allows players to focus on their mechanics and timing, which leads to a more effective serve.

Q2: How high should I toss the ball?

A: The toss should be high enough to allow for full extension of your hitting arm but not so high that it becomes difficult to control (especially on windy days).

Q3: What should I do if I keep missing my toss?

A: If you struggle with your toss, practice the drills outlined above. Focus on lifting the ball with minimal spin and aim for a consistent landing spot. Remember, practice makes perfect!

Q4: Can I practice my toss without a tennis court?

A: Yes! You can practice your toss at home or in any open space. Just ensure you have enough room to lift the ball without obstruction.

Q5: Are there additional resources for improving my serve?

A: Absolutely! For further learning, check out Ultimate Tennis Serve or explore Visual Tennis Lessons and Progression Drills courses.

With consistent practice, these drills will help you develop a reliable serve toss, setting you up for greater success on the court. Remember, the key to a great serve lies in a consistent toss!

Cosmin Miholca

Cosmin Miholca

Certified Tennis Coach

Ready to improve your tennis further?
Let’s get started!