
This forehand tennis lesson is built for learning on your own, one simple piece at a time. If you are new to tennis, the forehand is the shot you hit on your dominant side, and it quickly becomes one of the main ways to control a rally.
After the serve and return, it is one of the most important shots in the game.
You do not need a partner to start building a reliable forehand. A ball machine, a racket, and ideally around 100 balls are enough. The key is not trying to hit hard from the baseline on day one. Start close to the net, slow everything down, and develop the stroke in layers: grip, contact, preparation, loop, then movement.
Give yourself 5 to 7 seconds between feeds, and take a short break after every 10 balls. Good technique needs focused repetitions, not rushed swings.
The Grip
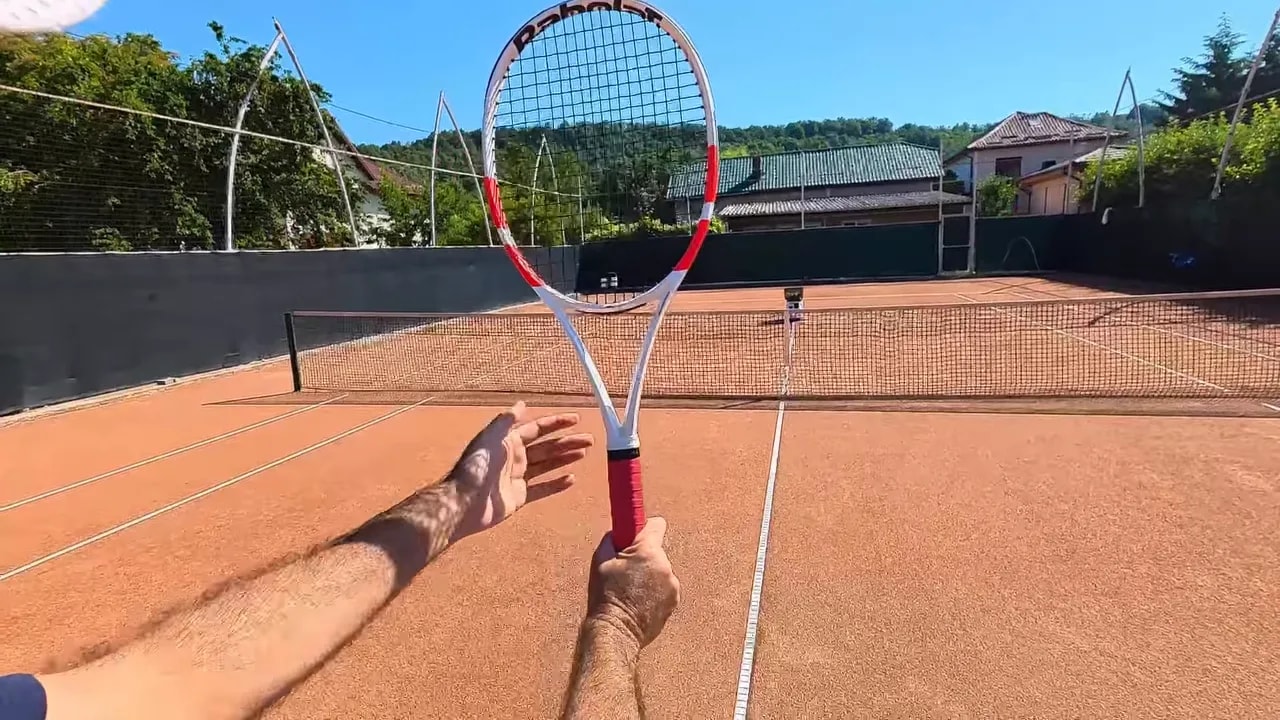
For this forehand tennis lesson, begin with a semi-western grip. It is a practical grip for learning topspin and keeping the racket face in a useful position through contact.
Here is the easiest way to find it:
- Hold the racket by the throat with your non-dominant hand.
- Place your dominant palm flat against the strings.
- Slide that hand down to the handle while keeping your palm facing the same way as the strings.
- Gently close your hand around the grip.
The simple feeling to remember is that the racket is an extension of your hand. Your palm and strings should face the same direction. This makes it much easier to understand how the racket face sends the ball.
Where to Stand
Start on the service line, not the baseline. This is one of the biggest shortcuts in a beginner forehand tennis lesson. Closer to the net, you are less tempted to swing too hard, the incoming ball is slower, and you have enough time to focus on the shape of the stroke.
Place the ball machine around the opposite service line and feed slow balls that bounce just inside the service box. Stand on your service line with your feet parallel to the net. This is an open stance.
Keep the setup simple. You are not trying to cover the whole court yet. You are training your body to recognize a comfortable contact point and repeat it. If contact feels crowded or too far away, use this guide on finding the right distance to the ball before adding speed.
Contact & Follow-Through
Contact and follow-through are the heart of this forehand tennis lesson. Begin in your open stance with the semi-western grip, palm and strings facing the machine. When the ball bounces in front of you, meet it with the strings facing forward and push the ball back over the net.
Do not try to blast it. Your first job is simply to clear the net consistently.
After contact, continue the swing up and over your non-dominant shoulder. Finish with the knuckles close to your ear, the racket behind your back, and your palm facing away. This is your follow-through.
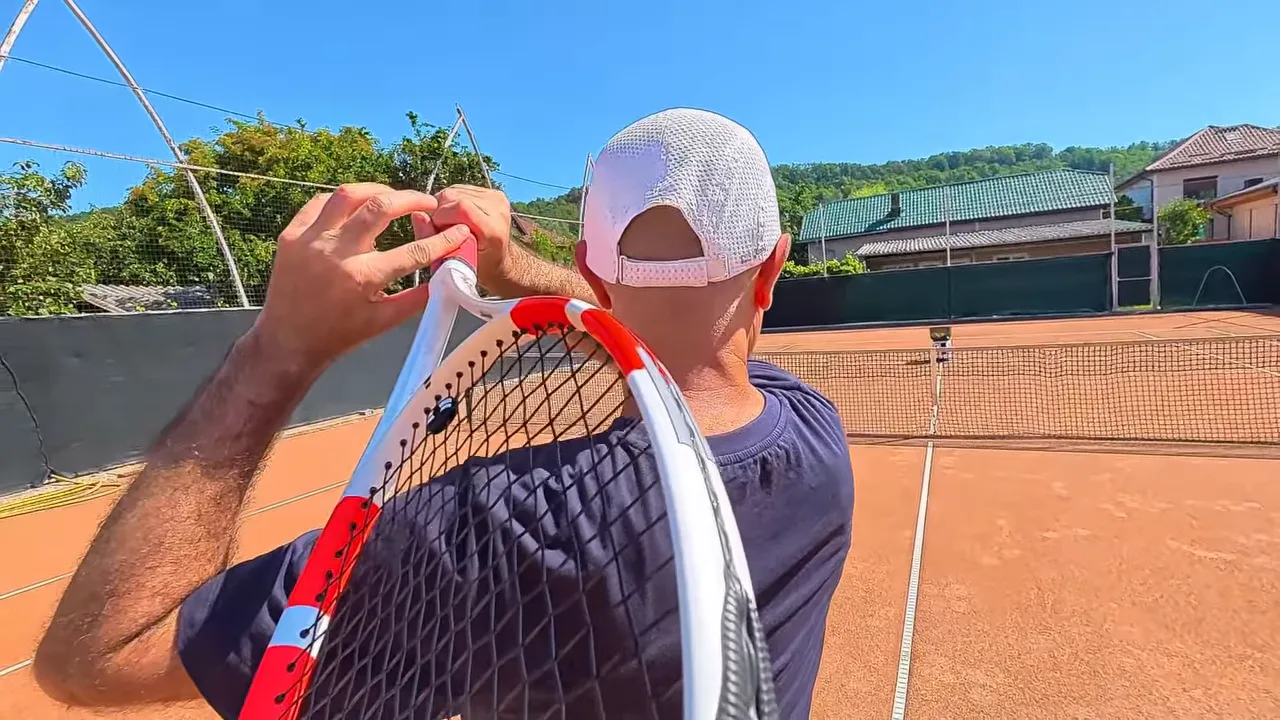 Practice this motion without a ball until it feels loose and natural. Then turn the machine on. Stay here until most balls are clearing the net comfortably.
If your forehand keeps falling into the net, these essential forehand fixes can help you correct grip, contact, balance, and net clearance.
The Pre-Stretch
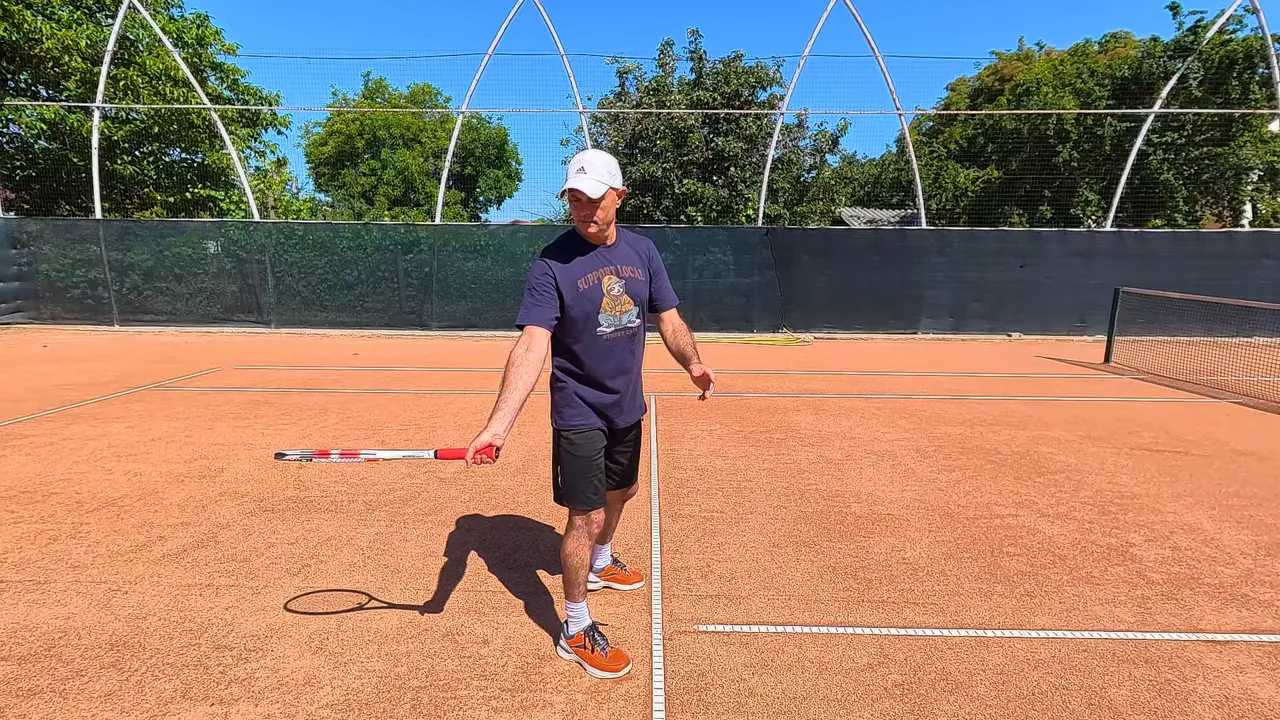
Once contact and the finish feel comfortable, add the pre-stretch. Stay at the service line in the same open stance. Before swinging, take the racket back so the handle points toward the net and the tip points toward the back fence. The strings should face down.
This is the pre-stretch position. From there, pull the racket forward through contact and into the same finish. Keep the hitting arm relaxed. A tight arm makes the stroke feel forced and makes it much harder to create a smooth path to the ball.
Again, rehearse the movement without balls first. Then use slow feeds and make sure the pre-stretch does not interrupt the clean contact point you developed earlier.
The Loop
Now your forehand starts to look like a complete stroke.
Begin in a ready position: semi-western grip, non-dominant hand supporting the racket throat, knees slightly bent, and weight on the balls of your feet.
Step out and load your weight onto your dominant foot while turning your shoulders sideways. The racket face points toward the side fence. From there, allow the racket to drop naturally with the strings facing down. That natural drop is the loop.
From the loop, flow into the pre-stretch, contact, and follow-through. Rotate your hips and shoulders through the shot, finishing with most of your weight on your non-dominant foot.
The important word here is flow. Do not make the loop a separate, stiff action. It should lead smoothly into the rest of the swing.
Quick Note: What You Need
A remote-controlled ball machine makes solo work much easier because you can start and stop feeds without constantly walking across the court. Loading at least 100 balls also gives you longer practice blocks with fewer interruptions.
The Pongbot Pace S Pro is the ball machine I use for this kind of controlled solo setup, with remote operation helping keep the focus on the stroke rather than resetting the machine.
|
Adding Footwork
When the stroke feels smooth from one spot, bring in the footwork.
Start in a ready position just behind the service line. Make a small hop, or split step, and land balanced on both feet.
Next, step out with your dominant foot and load onto it as you turn your hips and shoulders and take the racket back. Move a couple of steps along the service line, stop, load onto the outside foot, then make the loop and swing through the ball.
After the shot, push off the outside foot, cross over the inside foot, and shuffle back to your starting position. The sequence is:
- Split step.
- Move sideways.
- Stop and load on the outside foot.
- Loop, contact, and finish.
- Push off, cross over, and recover.
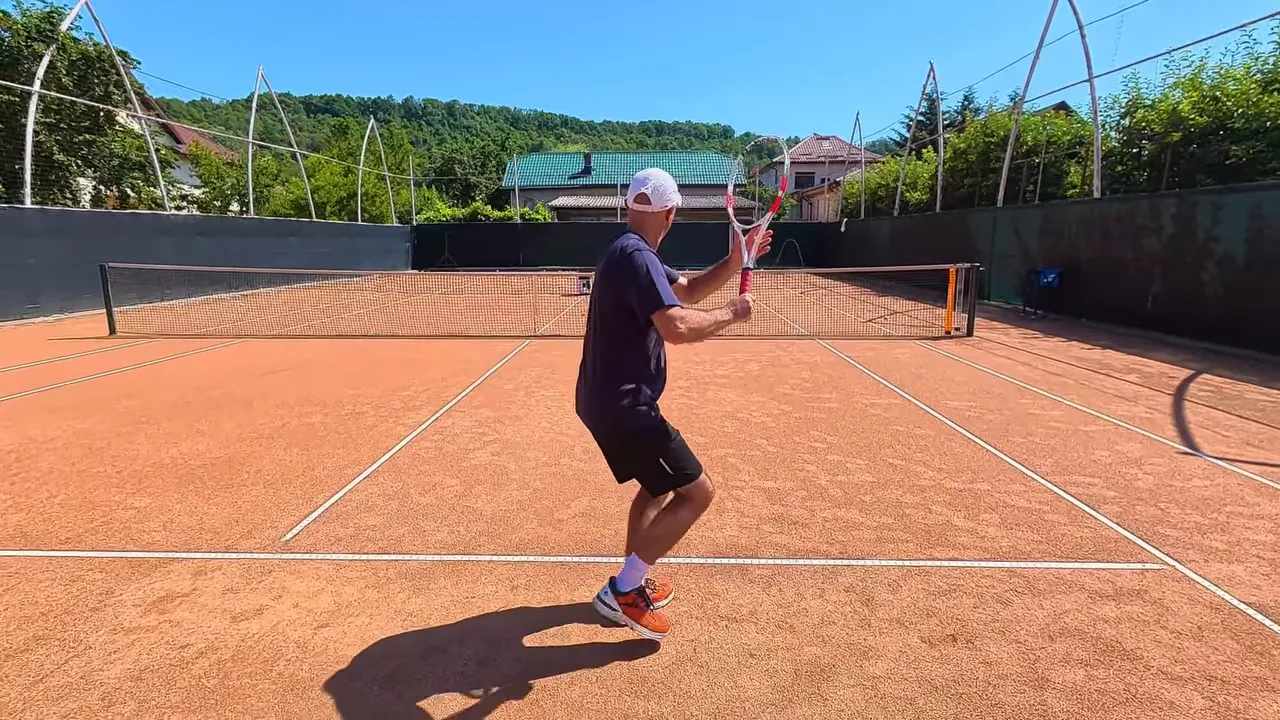 Walk through this pattern without balls hitting.
Then direct the machine to feed a few steps to the side and practice getting to the ball and recovering after every shot.
Do not rush. Leave plenty of time between balls until the movement and swing start working together.
Once that feels natural, set the machine for deeper feeds.
Progress from halfway between the service line and baseline, then eventually practice from the full baseline. For more ways to structure those sessions, use these ball machine tennis drills.
Wrapping Up
A solid forehand is not built by skipping straight to power. It is built by stacking simple, repeatable pieces in the right order:
- Grip: use the semi-western.
- Contact and finish: meet the ball in front and finish over the non-dominant shoulder.
- Pre-stretch: take the racket back with strings facing down.
- Loop: let the racket drop naturally and swing through with rotation.
- Footwork: split step, move, load, hit, and recover.
That is the foundation of this forehand tennis lesson. Build it patiently at the service line first, then earn your way back toward the baseline.
The advanced forehand comes later. Right now, clean contact, a relaxed swing, and balanced movement are more than enough.
FAQ
Can I learn a forehand with only a ball machine?
Yes. A ball machine gives you repeatable feeds, which makes it ideal for learning the grip, contact point, follow-through, and footwork without needing a partner.
Where should I begin this forehand tennis lesson?
Begin at the service line with slow feeds that bounce just inside the service box. This reduces the urge to swing too hard and gives you more time to focus on technique.
How many tennis balls should I use for solo forehand practice?
About 100 balls is a useful target. It gives you enough repetitions to develop rhythm without constantly stopping to collect balls.
When should I move back to the baseline?
Move back only after your contact, follow-through, loop, and recovery footwork feel comfortable at the service line. Progress first to halfway between the service line and baseline, then to the full baseline.
0 Comments