
Backhand Volley Tennis Lesson: 5 Steps to Build Control, Footwork, and Placement
A solid backhand volley shouldn’t start with trying to hit hard. It should begin with control.
The backhand volley is usually harder than the forehand volley because pushing forward with the back of the hand feels less natural for most players. But once you learn the right progression, the shot becomes simple, compact, and reliable.
This five-step progression uses a racquet, tennis balls, and ideally a ball machine. The purpose is to build the feeling first, then add the proper grip, racquet position, footwork, power, and placement.
Take your time with every stage. Do not move on just because you completed a few balls. Move on when you can control the contact comfortably.
Start With the Continental Grip and the Right Feeling
The grip for this backhand volley tennis lesson is the continental grip, also called the hammer grip.
A simple way to find it is to place the palm of your dominant hand against the edge of the racquet and slide it down to the bottom of the handle. You should feel as if you could hammer a nail with the racquet.
Before hitting fed balls, practice controlling a ball with the back of your hand.
Hold the racquet with your palm facing down and your knuckles facing up. Bounce a ball upward on the strings.
This strengthens the wrist and forearm while teaching you how to control the racquet face.
For younger players or anyone who finds this difficult, choke up on the grip or even hold the racquet at the throat.
Sponge balls are also a great option because they make the exercise easier to control.
- Start near the racquet throat if needed.
- Keep the palm down and knuckles up.
- Complete about 50 controlled bounces before sliding the hand lower.
- Use a relaxed grip, not a tight squeeze.
This early drill may look basic, but it gives you the exact feeling needed later: controlling the ball with the back of the hand rather than swinging at it.
Set Up the Ball Machine for Learning, Not Survival
A ball machine is excellent for a backhand volley tennis lesson because it gives you repeatable feeds and enough time to focus on one technical detail at a time. You can also ask a partner to feed balls, but the key is consistency and a slow pace.
Place the machine about halfway between the service line and baseline.
Since you will be standing closer to the net, this position produces a manageable ball speed.
Do not make the feeds too fast when you are learning. Fast balls force rushed movements and hide technical problems.
Use at least 100 balls if possible, ideally around 120.
Set feeds every five to seven seconds. After ten balls, take a short 15 to 20 second break. This gives you time to reset, assess your technique, and avoid practicing while tired and careless.
|
Step 1: Catch the Ball on the Strings
The first fed-ball drill is not about hitting over the net.
Hold the racquet at the throat and simply catch the ball on the strings. Think of catching it with the back of your hand.
Keep the racquet face slightly open so the ball rebounds gently upward.
Your knuckles should point in the same direction as the racquet face. Do not worry about footwork, power, or placement yet. Just learn to receive the ball with a relaxed hand and a quiet racquet.
This drill removes the urge to swing.
If the ball does not go over the net, that is fine. The goal is feel and control at contact.
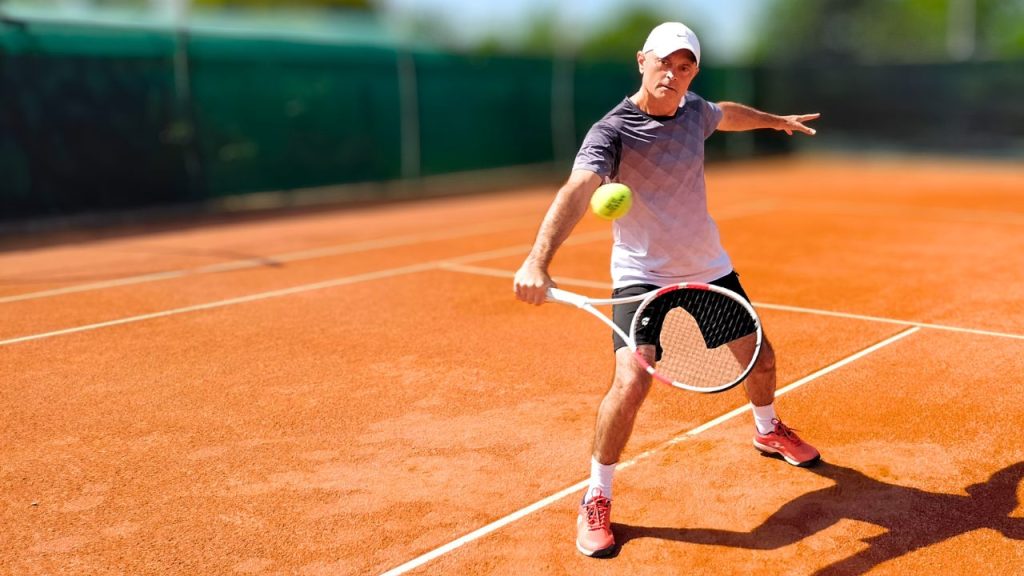
Step 2: Push Gently From High to Low
For the second stage of this backhand volley tennis lesson, slide your dominant hand to the top of the grip while staying in the continental grip. Let the non-dominant hand lightly support the racquet near the strings.
Now move from catching to a gentle push.
As the ball arrives, separate the hands and push slightly from high to low. Stop the racquet immediately after contact. It is a very short motion, not a swing.
The high-to-low action begins to create a little underspin. That slice helps the ball stay low after it crosses the net, making the next shot more difficult for your opponent.
Step 3: Use the Full Racquet With a Locked Wrist
Slide your hand all the way down to the bottom of the handle.
Maintain a roughly 90-degree angle between your forearm and racquet. The grip can stay loose, but the wrist should remain firm.
A loose grip does not mean a floppy wrist.
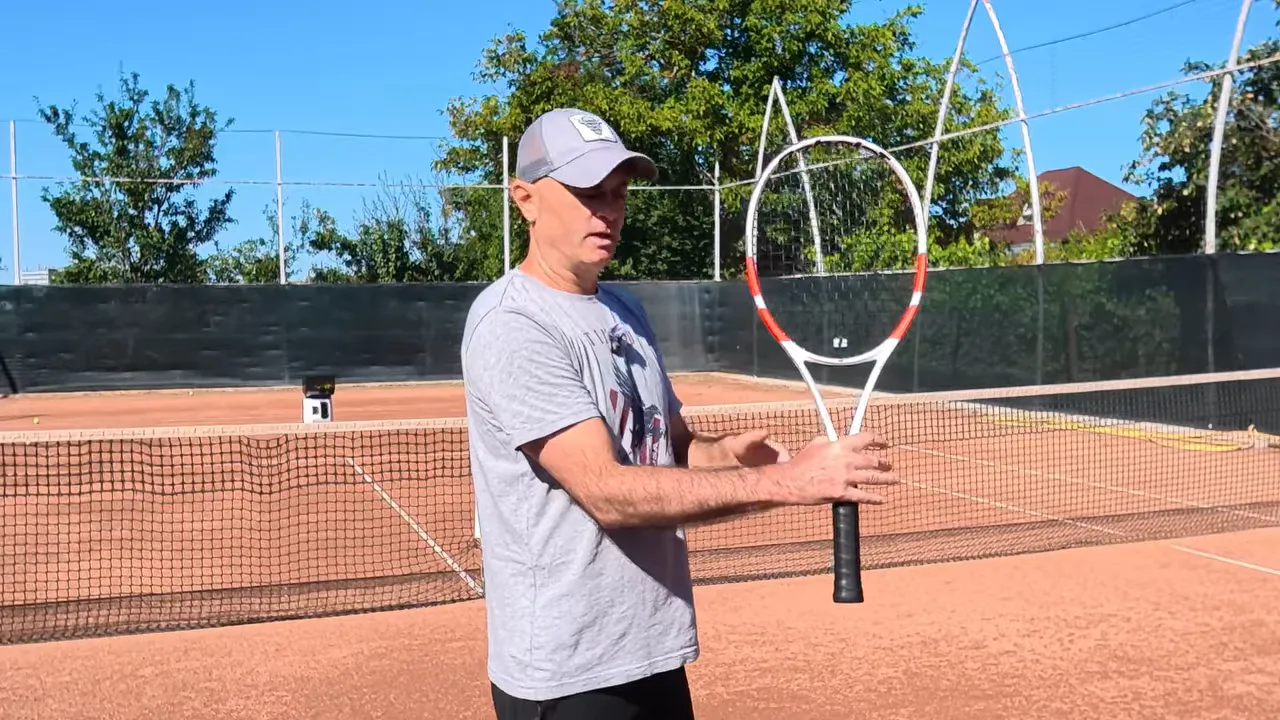 Keep the wrist firm so the racquet face stays stable through contact.
When the racquet head drops, the face can open too much and produce excessive slice. Instead, keep the tip of the racquet up and the back elbow elevated, pointing generally toward the back fence.
This does two important things:
- It keeps the racquet face only slightly open.
- It prevents the racquet from moving too far back.
Start with the non-dominant hand supporting the racquet throat.
As the ball comes, step in and punch gently from high to low. Then stop.
A proper backhand volley has a short backswing and almost no follow-through. For more help with that compact action, try this no-backswing volley drill.
Step 4: Add the Footwork
Once the upper body is under control, add the feet.
At the net, begin in a lower ready position with the racquet head higher than it would be at the baseline. Keep your hands and elbows out in front of the body, high enough that your eyes can look just over the racquet tip.
This matters because volleys arrive quickly. If your elbows are tucked against your body, the racquet tends to travel too far back during preparation, and you will be late.
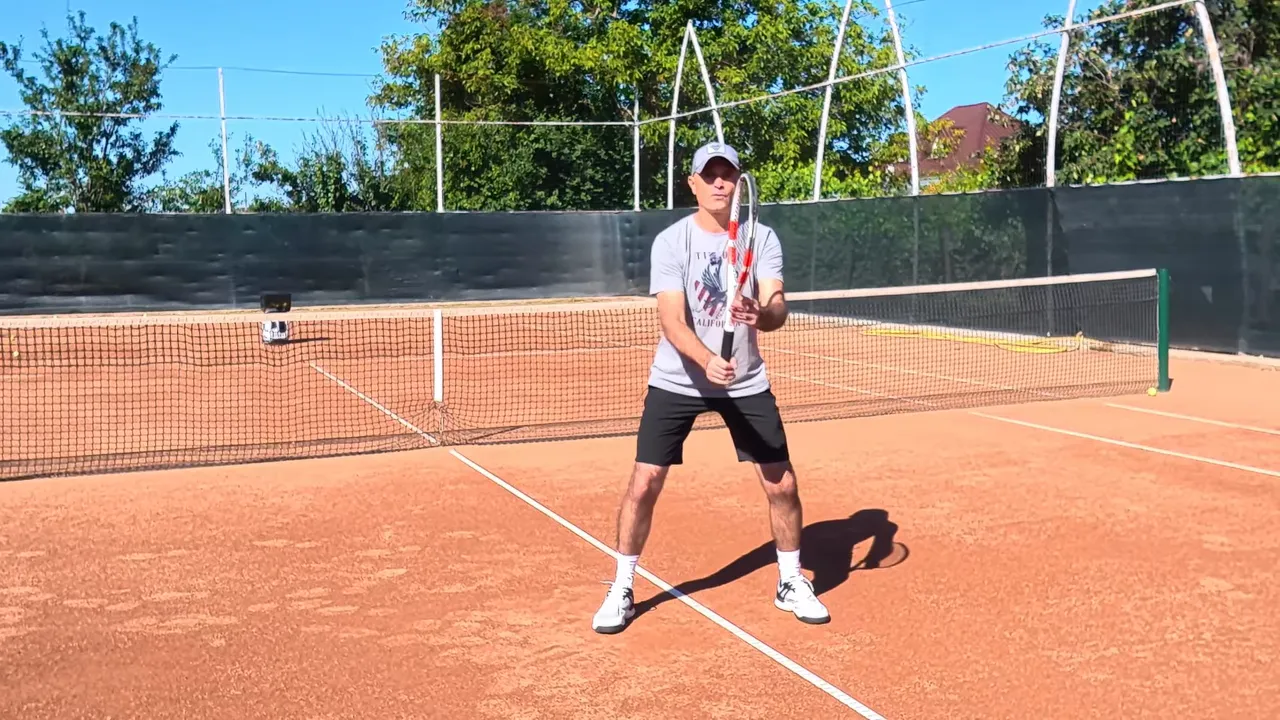 A low stance with the racquet held out in front prepares you for faster balls at the net.
The sequence is simple:
- Split step to become balanced and ready.
- Step out toward the backhand side and load the outside foot.
- Turn only slightly, about 45 degrees, rather than turning fully sideways.
- Step in with the inside or dominant foot as you make contact.
- Punch and stop immediately after contact.
Do not turn fully sideways. That takes the racquet too far back and creates a bigger swing than the volley needs.
The shoulders should turn slightly, with the body roughly facing the net post. The racquet should begin above the eventual contact point so it can move down through the ball.
This backhand volley tennis lesson is built around the same compact principles used in a broader step-by-step volley teaching progression: racquet in front, no big backswing, and a controlled step into the ball.
Step 5: Add Power and Placement
Only after the contact and footwork are working should you add more power. Take the racquet slightly farther back, punch a little more firmly, and allow a slightly longer finish if necessary.
It is still a volley, so the motion stays compact.
At this stage, alternate targets. Hit one backhand volley down the line, then hit the next crosscourt. Continue checking the same technical elements every time:
- Continental grip.
- Firm wrist and stable racquet face.
- Racquet head up and back elbow elevated.
- Split step, step out, then step in.
- High-to-low punch with no long follow-through.
A good backhand volley tennis lesson is not about rushing through five drills in one session. Spend as long as necessary at each stage. Once you have clean contact, add movement. Once movement is clean, add direction. Then you can make the shot stronger without losing the compact shape that makes it dependable.
For a focused solo session after learning the fundamentals, use this backhand volley punch and drop ball-machine drill. It is a great next step for developing feel, placement, and a lower ball after the bounce.
Frequently Asked Questions
What grip should I use for a backhand volley?
Use a continental or hammer grip. It helps keep the racquet face stable and makes it easier to hit both forehand and backhand volleys.
Should I use a follow-through on my backhand volley?
Keep the follow-through very short. Punch through contact from high to low, then stop the racquet instead of swinging across the body.
Why does my backhand volley have too much slice?
The racquet face may be too open, or the racquet head may be dropping. Keep the wrist firm, racquet tip up, and back elbow elevated.
Can I practice a backhand volley without a ball machine?
Yes. A partner can feed slow, consistent balls. Begin with the catch drill and progress to the push, punch, footwork, and placement stages.

0 Comments