Improve Your One-Handed Backhand: 4 Tennis Tips to Control Depth

Improve Your One-Handed Backhand: 4 Tennis Tips to Control Depth


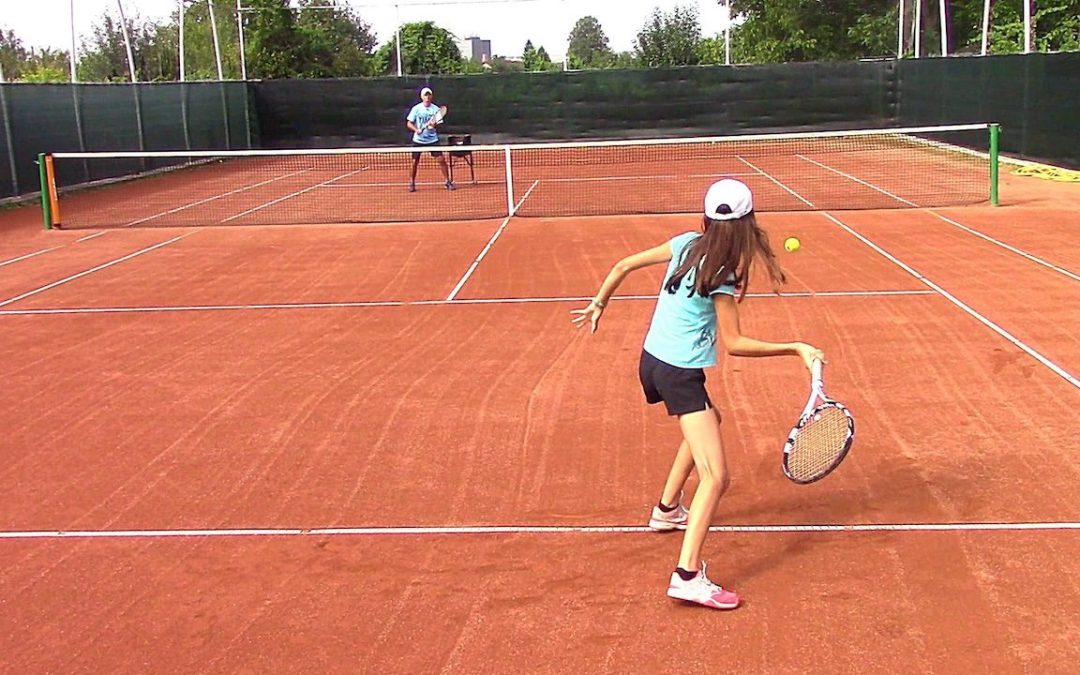
One Handed Backhand Tennis Fix: 4 Tips to Stop Missing Long (+ Tennis Drill to Try)

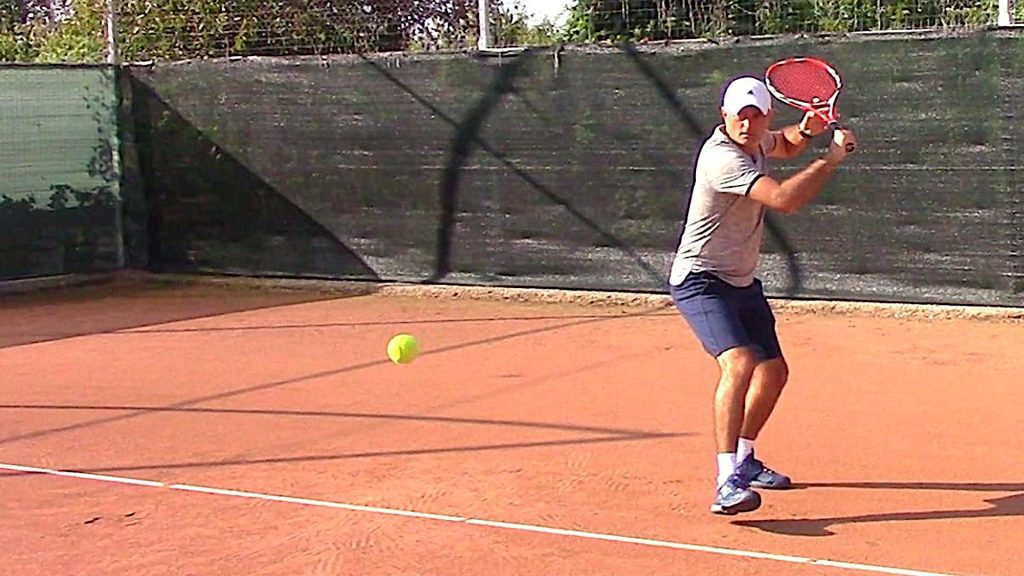
One of the common struggles many players face is missing their one-handed backhand and ground strokes deep.
This article will provide you with four essential tips to correct this issue and improve your overall performance on the court.
By the end, you’ll also find a practical drill that you can implement immediately to gain better control over your shot depth.

Understanding the One-Handed Backhand

The one-handed backhand is a beautiful stroke that, when executed properly, can be a powerful weapon in your tennis arsenal. However, many players find themselves consistently hitting the ball long, which can be frustrating and detrimental to their overall game. Understanding the key factors that influence this stroke is crucial for making the necessary adjustments.

Tip 1: Grip Matters

The first and perhaps most critical aspect to examine is your grip. If you’re using a continental grip, it may be time for a change. The continental grip, often referred to as the “hammer grip,” involves holding the racket as if you were hammering a nail with the edge of the racket. While this grip works well for many shots, it can lead to problems with the one-handed backhand.

For optimal results, switch to the eastern backhand grip. To do this, simply move your hand one bevel to the left (for right-handed players) from the continental grip. This adjustment will allow your racket face to be square at contact, which is essential for hitting the ball accurately. With the eastern backhand grip, you’ll find that you have better control, reducing the likelihood of sending the ball deep.

How to Identify Your Grip

To identify your grip, hold the racket and look at the bevels. The top bevel (bevel number one) is where the continental grip is placed – watch the video above for a visual demonstration. Moving one bevel to the left (if you’re right-handed) places you in the eastern backhand grip. This minor adjustment can make a significant difference in your shot execution.

Tip 2: Create Spin

The second reason you might be hitting your one-handed backhand too deep is the lack of spin. Spin is crucial for controlling the depth of your shots. Whether you’re generating topspin or slice, creating ball rotation is key. The more spin you can impart on the ball, the more it will drop into the court.

To achieve this, focus on your swing motion. You should be swinging from low to high, brushing up on the back of the ball. This technique will help you generate topspin, which will pull the ball down and into the court. Remember, the ball spins like a wheel, and that rotation helps you hit more shots in, minimizing the risk of going long.

Why Spin Matters

When the ball rotates, it creates differences in air pressure. The air on top of the ball pushes it down, helping it land earlier in the court. This is why mastering the art of spin is vital for enhancing your one-handed backhand. Not only does it give you better control, but it also increases your shot’s effectiveness against opponents.

Tip 3: Elbow Action

The third common mistake players make is leading with the elbow during their swing. When you lift your elbow too high, the racket face tends to open, causing the ball to sail long. Instead of lifting your elbow, keep it closed and let the racket do the work. This will ensure a more controlled stroke and a better chance of hitting your target.

Focusing on your elbow position can significantly enhance your shot accuracy. By keeping your elbow in a stable position, you’ll maintain better control over the racket face, which is crucial for hitting the ball where you want it to go (watch the video above for a visual demonstration).

Practical Tips for Elbow Control

  • Practice shadow swings to focus on your elbow position without the ball.
  • Incorporate drills that emphasize keeping the elbow tucked in during your swing.


Tip 4: Proper Weight Transfer

The final reason you could be hitting your one-handed backhand too deep is improper weight transfer. If you find yourself leaning back and transferring your weight backward as you hit, your racket face will open, resulting in deep shots. Instead, focus on transferring your weight forward into the shot.

To practice this, you can use a simple drill. Find a partner to feed you balls, or use a ball machine. As the ball approaches, step into it and transfer your weight onto your front foot at the moment of contact. This will help you make contact with the ball earlier and improve your depth control.

Drill for Weight Transfer

When practicing this drill, pay attention to your back foot. After making contact with the ball, lift your back foot off the ground. This action will force you to step into the shot and ensure that your weight is properly transferred forward (watch the video above for a visual demonstration). It’s a great way to develop the muscle memory needed for effective weight transfer in your one-handed backhand.

Conclusion

Improving your one-handed backhand doesn’t have to be a daunting task. By focusing on your grip, generating spin, controlling your elbow position, and ensuring proper weight transfer, you can significantly enhance your shot accuracy and depth. Remember to practice the suggested drill regularly to reinforce these techniques.

For those looking for more tennis training resources, check out our website – WebTennis24, where you can find additional tips, drills, and techniques to elevate your game. Don’t forget to support our channel and grab your free e-books to help you on your tennis journey!

one handed backhand tennis fix / technique

FAQs

What is the best grip for a one-handed backhand?

The eastern backhand grip is recommended for a one-handed backhand as it allows for a square racket face at contact, improving accuracy and control.

How can I generate more spin on my one-handed backhand?

To generate more spin, focus on a low-to-high swing path, brushing up on the back of the ball to create topspin.

Why is weight transfer important in tennis strokes?

Weight transfer is crucial because it helps maintain balance and control, allowing for more powerful and accurate shots.

Can certain drills help improve my one-handed backhand?

Yes, specific drills focusing on grip, elbow position, and weight transfer can significantly improve your one-handed backhand.

By applying these tips and consistent practice, you’ll be on your way to mastering your one-handed backhand and avoiding those frustrating deep misses. Happy hitting!

 

Cosmin Miholca

Cosmin Miholca

Certified Tennis Coach

Ready to improve your tennis further?
Let’s get started!

How to Hit a Perfect Half-Volley: A Step-by-Step Tennis Lesson

How to Hit a Perfect Half-Volley: A Step-by-Step Tennis Lesson


The Half-Volley Tennis Lesson: Techniques and Drills

Welcome to this comprehensive half-volley tennis lesson, where we will dive deep into one of tennis’s most challenging yet rewarding strokes.
Understanding the half-volley can significantly improve your game, whether you’re a beginner or an advanced player.
In this article, we will cover the essential techniques, grips, and drills to help you master this critical shot.

🎾 Intro to Half-Volley Tennis Lesson

The half-volley is a unique stroke that requires a combination of good anticipation, racket control, and balance. It is often encountered during match play, especially when transitioning from the baseline to the net.
In doubles, your opponents will frequently aim to hit the ball down at your feet, making the half-volley an essential skill to develop.
The goal of this lesson is to guide you step-by-step through the different aspects of the half-volley, including grip, preparation, contact, and follow-through.

🎾 Half-Volley: Grip & Preparation

The first step in executing a successful half-volley is mastering the grip. I highly recommend using the continental grip, often referred to as the hammer grip. To achieve this grip, position the V formed by your index and thumb on the edge of the racket and slide it down towards the bottom.
This grip allows you to have better control and makes it easier to react quickly to incoming shots.

As you approach the net and notice a ball coming toward your feet, transition into the continental grip.
It’s crucial to never stand straight when preparing to hit a half-volley. Always bend your knees to lower your center of gravity. This position not only enhances stability but also enables you to get down to the ball more effectively.
Remember, your back should remain straight while you bend your knees!

When preparing to hit the ball, ensure that your racket is behind the path of the incoming shot, and avoid taking a backswing.
The half-volley is about quick reaction and finesse, not about power. So, as you get into position, keep your racket parallel to the ground, ready to make contact with the ball just after it bounces.

🎾 Half-Volley: The Contact

Contacting the ball during a half-volley is crucial for success.
As you bend your knees and get into position, aim to make contact right after the ball bounces. Your racket should be positioned in front of you, with strings facing forward.
It’s important to maintain that 45-degree angle with your body towards the net post, ensuring that your racket doesn’t swing back behind your shoulders.

At the moment of contact, think of the half-volley as a push rather than a swing. You won’t generate much power from a backswing, so focus on using your legs to provide the necessary force.
As you push through the ball, transfer your weight forward. This technique not only helps in controlling the shot but also ensures that you maintain momentum after making contact.

🎾 Half-Volley: Finish/Follow-Through

The follow-through in a half-volley is shorter and more controlled than in other strokes. After making contact, continue directing your racket towards your target.
If you aim for a cross-court shot, your racket should finish pointing in that direction. For a down-the-line shot, adjust your follow-through accordingly.

Remember, the half-volley is not about elaborate follow-throughs; it’s about precision and placement.
As you practice, focus on guiding the ball rather than trying to hit it hard. The objective is to get the ball over the net and into the court while avoiding giving your opponents an easy opportunity to attack.

🎾 Half-Volley: Purpose in Singles and Doubles Play

Understanding the strategic use of the half-volley is vital for both singles and doubles play. In singles, the half-volley can be used to keep the ball straight ahead or to exploit openings. In doubles, the priority shifts to keeping the shot away from the opposing net player. Always remember to keep your shot low and controlled to minimize the chance of giving your opponents a high ball to attack.

In summary, the half-volley serves as a crucial transition shot. It’s essential to keep moving forward after hitting the ball, maintaining pressure on your opponents, and positioning yourself for the next shot.
The half-volley is not just a defensive move; it can also be an offensive weapon when executed correctly.

🎾 Half-Volley: Progression Drills

Now that you have a solid understanding of the half-volley, let’s dive into some effective drills to practice this skill. Start with a few basic drills to build your confidence and consistency:

  • Solo Bounce Drill: Begin by holding the racket with the continental grip. Bounce a ball in front of you and, as it drops, bend your knees and catch the ball right as it comes up off the ground. Focus on getting the racket behind the ball without a backswing, and push through the ball using your legs.
  • Partner Feeding Drill: Position yourself at the service line or behind it while a partner feeds you balls. Ensure that you turn your body slightly sideways at a 45-degree angle. As the ball approaches, bend your knees and push through the ball right after it bounces.
  • Ball Machine Drill: If you have access to a ball machine, set it to feed balls just inside the service line. Practice your half-volley technique by focusing on timing, footwork, and pushing through the ball. This drill simulates match conditions and allows you to work on your placement.
  • Placement Drills: As you become more comfortable with the half-volley, practice targeting specific areas of the court. Aim for cross-court shots and down-the-line shots, ensuring that your racket follows the direction of your target.

These drills will help you develop the timing, footwork, and control necessary for executing effective half-volleys during matches.
Remember to have fun with your practice and be creative with your drills!

half-volley tennis technique lesson

FAQ

What is a half-volley in tennis?

A half-volley is a shot executed just after the ball bounces, requiring quick reflexes and precise control. It is often used when transitioning from the baseline to the net.

Why is the continental grip important for half-volleys?

The continental grip allows for better control and quick adjustments when responding to low balls, making it an ideal choice for executing half-volleys.

How can I improve my half-volley technique?

Practice drills that focus on timing, footwork, and the push-through technique. Consistent practice with a partner or ball machine will enhance your skills.

Is the half-volley an offensive or defensive shot?

The half-volley can be both! While it is often used as a defensive shot to handle low balls, it can also be strategically placed to create offensive opportunities against your opponents.

In conclusion, mastering the half-volley is essential for any tennis player looking to elevate their game. By focusing on the grip, preparation, contact, and follow-through, you can develop a reliable half-volley that will serve you well in matches.

For more in-depth training and tips, check out Cosmin’s Tennis Training.


Cosmin Miholca

Cosmin Miholca

Certified Tennis Coach

Ready to improve your tennis further?
Let’s get started!

Enhance Your Groundstroke Accuracy with This Tennis Drill

Enhance Your Groundstroke Accuracy with This Tennis Drill


2 Cross-Court / 1 Down-the-Line

Are you ready to elevate your tennis skills? This tennis accuracy drill is a fantastic way to improve your precision and consistency on the court. In this blog, we’ll break down the steps of this drill and how to effectively implement it in your practice sessions – watch the video above for a visual demonstration.

Setting Up the Drill

To kick things off, find a partner or coach and head to the deuce service box. Begin by alternating between crosscourt shots and down-the-line shots. For instance, you can start with two crosscourt forehands followed by one down-the-line shot. This sequence not only sharpens your accuracy but also builds your confidence in hitting targets.

First Phase: Forehand Focus

Let’s dive into the specifics. Start by hitting two balls crosscourt, then aim for a down-the-line shot. This simple yet effective sequence will help you develop a consistent rally. After that, switch it up by rallying two balls to your partner, then finish with a powerful shot down the line. It’s essential to keep the rhythm while focusing on placement.

Second Phase: Backhand Challenge

Once you’re comfortable with your forehand, it’s time to switch gears and work on your backhand. Repeat the same pattern: two crosscourt shots followed by one down the line. As you progress, challenge yourself by moving back to the baseline and maintaining your accuracy. This transition will help simulate real match conditions.

Maintaining Consistency

Throughout the drill, the key is to maintain consistency. If you find yourself struggling, don’t hesitate to slow down and focus on your form. Remember, hitting the ball with precision is more important than speed. The tennis accuracy drill is all about developing a reliable technique that you can trust in match situations.

Why This Drill Works

The beauty of this tennis accuracy drill lies in its simplicity. By breaking down your shots into manageable sections, you can concentrate on your footwork, timing, and shot selection. This method not only builds muscle memory but also enhances your ability to place the ball where you want it to go, whether it’s during practice or a match.

Taking It to the Next Level

Once you feel confident with the basic drill, consider adding variations. For instance, you can increase the speed or incorporate different spins. This way, you can challenge yourself further and keep your practice sessions engaging.

Additional Resources

If you’re looking for more drills and tips, check out WebTennis24 for a wealth of online resources tailored for players and coaches. You can find everything from video lessons to detailed strategies that will help you sharpen your game.

Tennis Accuracy Drill

Frequently Asked Questions

What level is the tennis accuracy drill suitable for?

This drill is great for players at a 4.0 level and above.

How often should I practice this drill?

Incorporate the tennis accuracy drill into your practice routine at least once a week to see significant improvements.

Can I do this drill alone?

While it’s best with a partner or a tennis coach, you can adapt the drill to practice against a ball machine if necessary.

What should I focus on during the drill?

Concentrate on your footwork, shot placement, and maintaining a consistent rhythm throughout the sequences.

Ready to boost your tennis performance? Start implementing the tennis accuracy drill today! With dedication and practice, you’ll see your precision and confidence soar on the court.


Cosmin Miholca

Cosmin Miholca

Certified Tennis Coach

Ready to improve your tennis further?
Let’s get started!

Favorite Tennis Drill for Serve Accuracy 🎾

Favorite Tennis Drill for Serve Accuracy 🎾


Serve 1-2-3: A Tennis Drill to Improve Accuracy

Serve accuracy is a crucial aspect of tennis that can dramatically influence match outcomes. Whether you’re a beginner or an advanced player, improving your serve accuracy can lead to more consistent performance on the court.
In this blog post, we will explore a highly effective serve accuracy tennis drill that focuses on placement and tactical execution, ensuring you can confidently hit your spots during matches.

The Importance of Serve Accuracy

A powerful serve is essential in tennis, but it’s not just about speed; accuracy is key. A well-placed serve can put your opponent on the defensive, allowing you to dictate the pace of the game. Understanding the significance of accuracy will motivate you to practice consistently and improve your overall game.

Setting Up the Drill

To get started with this drill, you’ll need to set up your court effectively. Here’s how:

  • Divide the service boxes into two halves: left and right.
  • Designate the left half as your opponent’s forehand side and the right half as the backhand side, assuming they are right-handed.
  • Use a row of balls to mark the divisions clearly.

Drill Steps

This drill is designed to enhance your serve placement. Follow these steps to practice effectively:

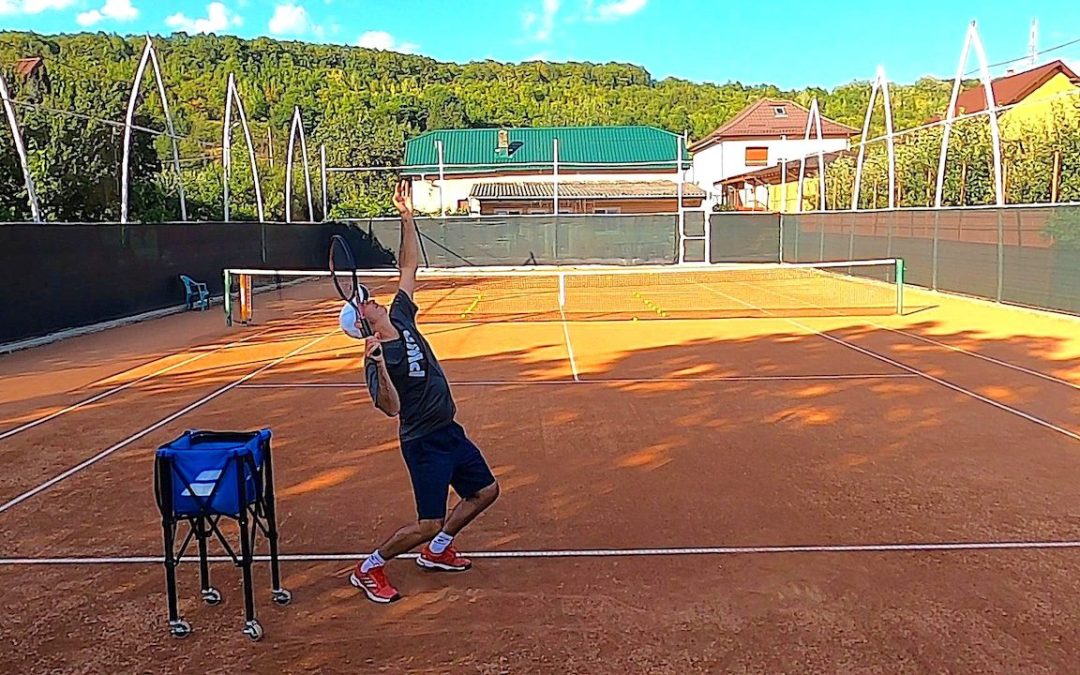
  1. Start serving from the deuce court, aiming to hit one ball into each half of the service box. This will give you a total of two halves to target. The same goes for the ad court.
  2. Once you’ve successfully placed one serve in each half, progress to two serves in each half.
  3. Continue this pattern, increasing the number of serves in each half until you reach three, four, or even ten serves per half, depending on your skill level and stamina.

Executing the Drill

Let’s break down the execution of this drill:

Begin with the right side and aim for one serve in each half, starting with the opponent’s forehand side. As you warm up, you can use different types of serves:

  • Flat Serves: Great for targeting the center of the service box.
  • Slice Serves: Ideal for serving wide to the deuce side.
  • Kick Serves: Useful for getting the ball high and into the backhand corner on the ad side.

Example Execution

As you serve, focus on your toss and follow-through. For instance, when aiming for the forehand side, you might use a flat serve to target the center, while a slice serve can be effective for the wide shot. After hitting one serve in each half, challenge yourself by hitting two serves in each half. Keep track of your successes and strive to improve your accuracy with each attempt.

Progressing the Drill

Once you feel comfortable with the initial steps, you can increase the challenge:

  • Move to three serves in each half, maintaining the same focus on placement.
  • Experiment with different types of serves as you progress, mixing up your tactics.
  • Consider using variations, such as aiming for different target areas within the service boxes.

Benefits of the Drill

This serve accuracy tennis drill offers numerous benefits:

  • Improved Placement: You’ll learn to hit specific targets consistently.
  • Increased Confidence: Mastering your serve will give you confidence during matches.
  • Tactical Awareness: Understanding where to place your serve will help you exploit your opponent’s weaknesses.

Common Mistakes to Avoid

As you practice, be mindful of these common pitfalls:

  • Inconsistent Toss: Ensure your toss is stable and at the right height.
  • Lack of Focus: Stay mentally engaged during each serve; visualize your target.
  • Neglecting Follow-Through: Your follow-through is crucial for accuracy and power.

Conclusion: Embrace the Challenge

Improving your serve accuracy is a journey that requires dedication and practice. This drill offers a structured approach to enhance your skills effectively.
Remember: the more you practice, the better you will become.
So grab your racket, set up your court, and start honing your serve accuracy today!

tennis serve from the ad side

FAQs

What is the best type of serve to practice for accuracy?

Flat serves are excellent for targeting the center of the service box, while kick and slice serves can be effective for wide shots. Incorporating both types into your practice will enhance your overall accuracy.

How often should I practice this drill?

Consistency is key. Aim to practice this drill at least two times a week for optimal improvement.

Can I do this drill alone?

Yes! This drill can be executed solo, allowing you to focus on your serve placement without the need for a partner.

What should I focus on during the drill?

Concentrate on your toss, follow-through, and the type of serve you’re using. Visualization of your target can also improve your accuracy significantly.

Take Action!

Are you ready to elevate your serve accuracy? Start practicing this drill today and witness the transformation in your game. For more tips and drills, check out additional resources at YouTube and Cosmin’s Tennis Training.


Cosmin Miholca

Cosmin Miholca

Certified Tennis Coach

Ready to improve your tennis further?
Let’s get started!

Is the Tennis Clay Court Better Than a Hard Court?

Is the Tennis Clay Court Better Than a Hard Court?


Personal Experience: Clay Court vs. Hard Court

Intro to Something Different

Today, let’s dive into something a bit different. We’re exploring the world of tennis courts, specifically focusing on the clay tennis court as we take a closer look at its unique characteristics and compare it to hard courts. I invite you to share your favorite court surface in the comments below – I’ll share mine, too!

Whose tennis court is it, and why do you hear animal sounds around it?

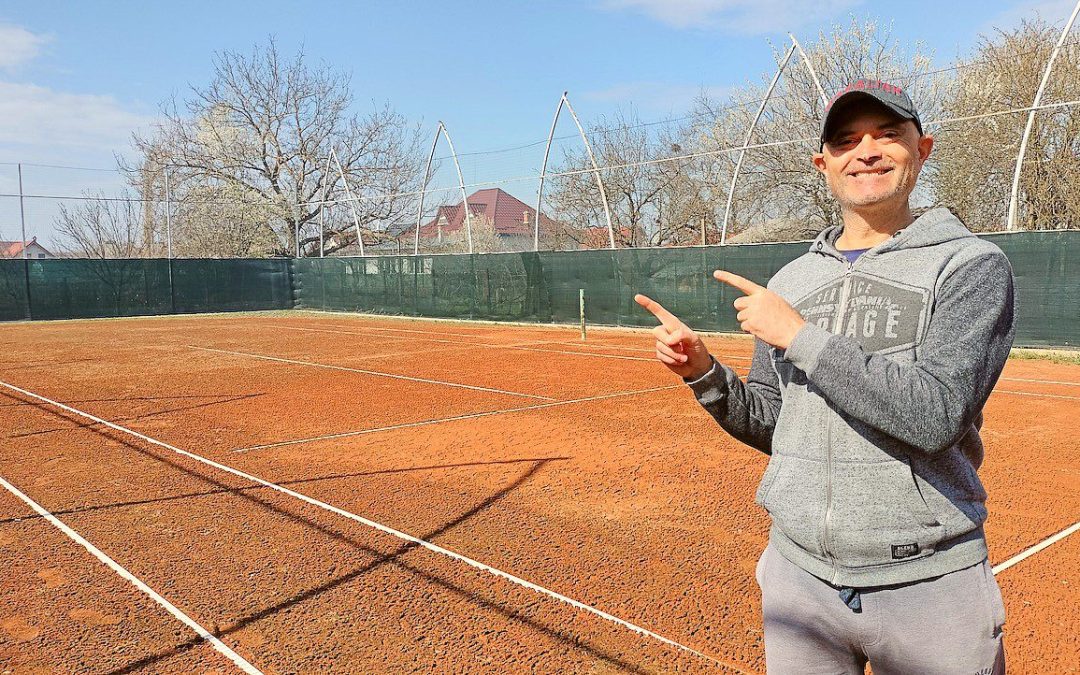
Before we jump into the details, let me introduce you to a special tennis court. This particular court belongs to one of my neighbors, who has graciously allowed us to film lessons and share tips over the years.
You might have noticed in some videos the sounds of roosters, dogs, and even cows in the background. That’s because this is a private neighborhood with small farms scattered around, giving it a unique charm.

Entering the clay court facility: the abandoned court cover, the new windscreen, and the state of the court after winter

As we enter our clay court facility, you’ll notice the abandoned court cover and the new windscreen that I recently installed. After a long winter, the court isn’t in the best shape – there’s grass and tools scattered everywhere (see the video above).
The windscreens need replacement every couple of years due to wear and tear from the elements, but they do enhance the appearance and functionality of the court.

Interesting facts about playing on a clay court – things few people know, including maintenance, customs, advantages, and disadvantages

Now, let’s talk about some interesting facts regarding clay courts that many may not be aware of.
One of the first things to note is maintenance. Preparing a clay court for play takes about 15-20 minutes. This includes:

  • Brushing: We use a special brush to smooth out the surface and remove any marks or debris.
  • Cleaning the lines: A specific broom is employed to clean the lines, ensuring they are visible for accurate play.
  • Watering: It’s essential to water the court to keep the dust down. A hose is used to lightly spray the surface, preventing dry conditions that can lead to dust inhalation during play.

Interestingly, it’s customary to leave the court in good condition for the next players. After your game, you should brush the court, clean the lines, and water it again.
This routine can take another 15 to 20 minutes, which is why some players prefer hard courts – less maintenance!

On the plus side, clay courts are easier on your joints, providing a softer surface that reduces the risk of injuries. They allow for longer rallies, favoring players who excel in patience and strategic play. However, if you prefer a faster game with less emphasis on maintenance, hard courts might be more appealing.

Tennis Clay Court

FAQs

What is a hard court in tennis?

A hard tennis court is made of asphalt or concrete, offering a faster surface with more consistent bounces, making it ideal for players with strong attacking skills.

What is the difference between clay and hard court tennis?

Clay courts are softer and bouncier, resulting in slower-paced games with more spin, while hard courts provide a faster surface with less spin.

Are clay courts better for the knees?

Yes, clay courts are less likely to cause strain and provide a more forgiving environment for players with joint pains or pre-existing injuries.

Can I wear clay shoes on a hard court?

While you can, it’s not advisable as clay shoes are designed for different traction and may not perform well on hard surfaces.

Who is the best player on hard court?

Novak Djokovic is often recognized as one of the best players on hard courts, along with other legends like Andy Murray and Roger Federer.


Cosmin Miholca

Cosmin Miholca

Certified Tennis Coach

Ready to improve your tennis further?
Let’s get started!

No Backswing, No Problem: The Drill to Fix Your Tennis Volley!

No Backswing, No Problem: The Drill to Fix Your Tennis Volley!


How to Teach the No-Backswing Tennis Volley

The no-backswing tennis volley lesson is a game-changer for beginning and intermediate players. Players can make early contact with the ball by keeping the racket in front of their shoulders, resulting in cleaner and more consistent volleys.
This blog post will delve into the essential drills and techniques to help you learn this important skill.

Table of Contents

Introduction to “No-Backswing Tennis Volley”

I emphasize the importance of avoiding a backswing when teaching the volley, especially to beginners.
The entire volley stroke should happen in front of the player’s shoulder, whether they are hitting a forehand or backhand.
Keeping the racket from going behind the line of their shoulders is crucial for developing proper technique.
This approach helps players make better contact with the ball and improves their overall consistency.

Fence Drill Description

To help players grasp the concept of the no-backswing volley, I use a simple drill where they stand with their backs against a fence (watch the video above for more details). This drill reinforces the idea that the racket should not touch the back fence during the stroke.
Here’s how it works:

  • Players start in a ready position with their backs against the fence.
  • They practice volleying, ensuring that their racket does not touch the back fence.
  • The focus is on keeping everything in front of their shoulders while stepping into the ball.

As they practice this drill, I remind them to think of the volley as a push rather than a punch. This helps them understand the importance of maintaining a stable racket head and controlling their shot.

Fence Drill Practice

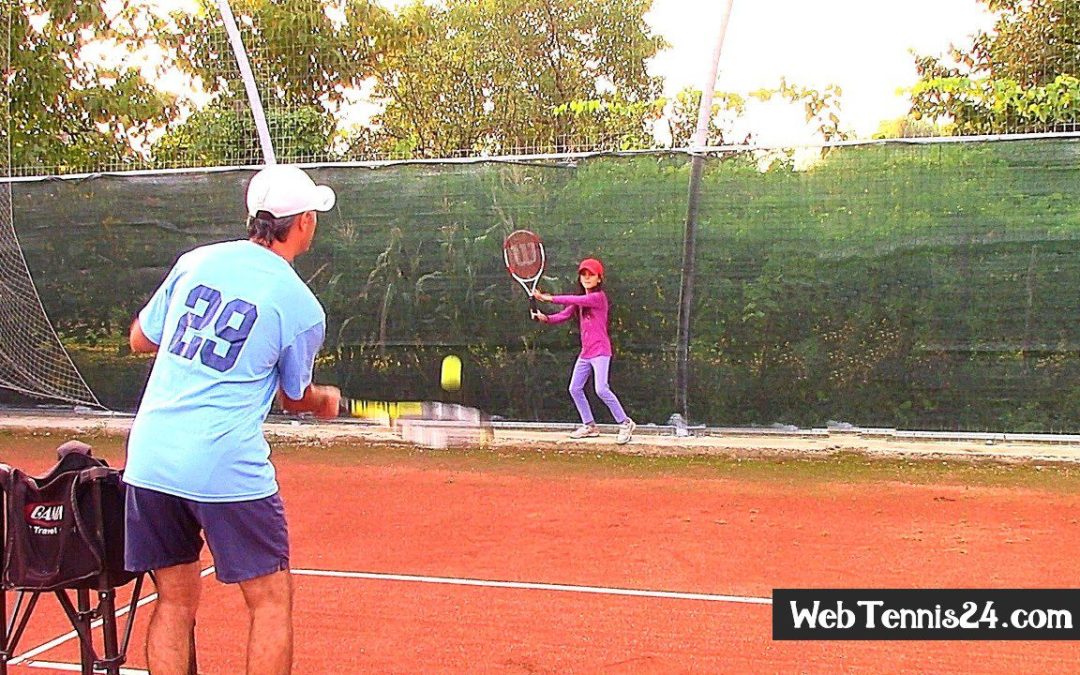
Once players understand the drill, it’s time to practice. I often set up my two daughters, Bianca and Cezara, to demonstrate. They stand with their backs against the fence, ready to volley.
First, I guide them through a series of forehand and backhand shadow volleys, emphasizing the importance of not hitting the fence behind them.

During practice, I encourage them to:

  • Set up in the ready position.
  • Step into the ball with their racket heads up.
  • Maintain their racket in front of their shoulders.

For instance, when they practice their forehand volley, I might say, “Get ready, Bianca. Set, push!” This straightforward instruction helps them focus on the action without overthinking the mechanics.
As they practice, I remind them that the goal is to keep their racket head stable and avoid bringing it too far back.

Practice at the Net / No-Backswing Tennis Volley

After the fence drill, it’s time to move to the net.
I remind my daughters to visualize the fence still behind them as they continue practicing their volleys. The key is to ensure that everything happens in front of their shoulders.
I guide them through a series of forehand and backhand volleys, emphasizing the same principles from the fence drill.

In this setting, I instruct them to:

  • Get set and push the ball with their racket.
  • Maintain a stable racket head without swinging back.
  • Focus on making early contact with the ball.

As they volley, I encourage them to think about the push rather than a swing. I often say, “Imagine you still have the fence behind you. Everything happens in front!” This mental cue helps them stay consistent and focused on their technique.

Final Tips

As with any tennis skill, mastering the no-backswing volley takes time and practice. Here are some final tips to help you improve your technique:

  • Stay Relaxed: Tension can lead to mistakes. Keep your grip relaxed to allow for better racket control.
  • Focus on Timing: Early contact is key. Anticipate the ball’s arrival and position yourself accordingly.
  • Keep Practicing: Consistency comes with repetition. Regular practice will help solidify your technique.

Remember, the goal is to keep everything happening in front of your shoulders, which will not only improve your volleys but also enhance your overall game.

no-backswing tennis volley / coaching lesson

F.A.Q.

What is a no-backswing volley?

A no-backswing volley is a technique where the player keeps the racket in front of their shoulders, avoiding any significant backswing. This approach allows for quicker and more controlled volleys.

Why is it important to avoid a backswing?

Avoiding a backswing helps players make early contact with the ball, resulting in more consistent and accurate volleys. It also reduces the risk of mishitting the ball.

How can I practice the no-backswing volley?

Start with the fence drill, where you practice volleying with your back against a fence. Then, transition to practicing at the net, keeping the same principles in mind.

Can beginners use this technique?

Absolutely! The no-backswing volley technique is beneficial for players of all levels, including beginners. It helps establish a solid foundation for effective volleying.

Are there any drills to improve my volleying skills?

Yes! In addition to the fence drill, practicing with a partner at the net, focusing on keeping your racket in front, is an excellent way to improve your volleying skills.

For more tennis drills and lessons, feel free to check out Cosmin’s Tennis Training for valuable resources and tips.


Cosmin Miholca

Cosmin Miholca

Certified Tennis Coach

Ready to improve your tennis further?
Let’s get started!

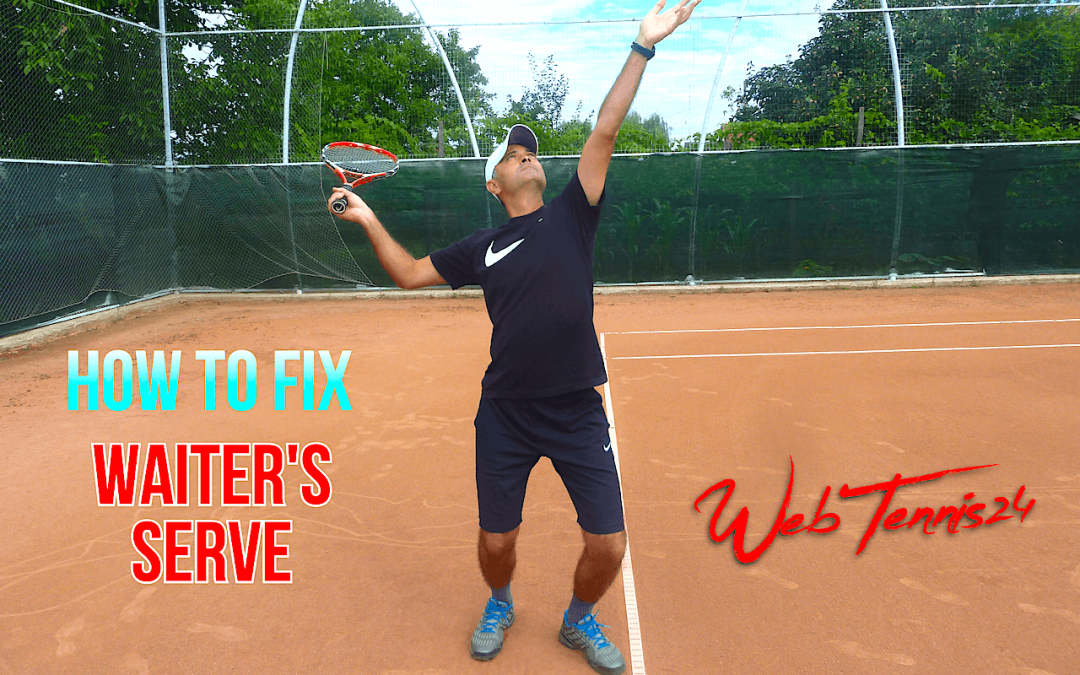
7 Steps to Fix the Waiter’s Serve in Tennis

7 Steps to Fix the Waiter’s Serve in Tennis


How to Fix the Waiter’s Serve in Tennis

If you’ve been struggling with the waiter’s serve in tennis, you’re not alone. Many players face this technical flaw, but with the right guidance, it can be fixed!

In this blog post, we will break down the 7 steps to correct the waiter’s serve, focusing on the two major components that need fixing: the racquet back-drop, and the swing up to meet the ball. Let’s dive in!

Table of Contents

The 2 Major Components to Be Fixed

The first step in fixing the waiter’s serve is understanding the two major components that lead to this common issue.
The waiter’s serve typically features an open racket face as it swings towards the ball. This is often due to two main errors:

  • Wrist Position: Players often lay back their wrists too much in the trophy position, which opens the racket face prematurely.
  • Swing Path: Players tend to open the racket face too early.

To correct these flaws, we need to focus on the wrist position and the swing path during the serve (watch the video above for visual details).

The Proper Serve Grip

Before diving into the steps, let’s talk about the grip.
For a proper serve, you should use a continental grip. To achieve this grip, slide down towards the bottom of the grip, holding the racket as if you were hammering a nail with the edge of it.
Getting the grip right is crucial as it sets the foundation for your serve technique.

Step #1: Swing Up with the Edge

The first drill focuses on getting the player accustomed to swinging up with the edge of the racket. Here’s how to do it:

  1. Stand close to a fence with a windscreen.
  2. Hold the racket with a continental grip behind your back, palm inward.
  3. Practice swinging up towards the fence with the edge of the racket and tapping it.

Repeat this exercise at least 10 times to build a habit of swinging up with the edge.

Step #2: Swing Up & Pronate

Once you’re comfortable with the first step, it’s time to incorporate pronation into your swing. Here’s how:

  1. Begin with the racket behind your back, palm inward, as in the previous step.
  2. After swinging up towards the fence with the edge, turn your wrist inward just before making contact. This motion is called pronation.

Practice this sequence multiple times until it feels natural.

Step #3: Tap the Ball with the Edge

Now, let’s add a ball into the mix. Here’s how to practice:

  1. Stand just behind the service line to resist the temptation of swinging too hard.
  2. Hold the racket in the continental grip behind your back, palm inward.
  3. Toss the ball and swing up, trying to tap it with the edge of the racket.

Focus on the motion rather than the impact at first. Aim for at least 10 repetitions.

Step #4: Swing Up, Pronate & Contact

In this step, you’ll combine everything you’ve learned so far:

  1. Start with the racket behind your back and swing up towards the ball with the edge.
  2. Just before making contact, pronate your wrist inward.
  3. Focus on making contact without worrying about the follow-through.

This step is crucial for developing the right technique without falling back into old habits.

Step #5: Serve Backswing & Proper Racquet Back-Drop

Now, let’s introduce the backswing:

  1. Position yourself sideways to a fence, holding the racket with a continental grip.
  2. Get into the trophy pose and let the racket drop between the V made by your thumb and index finger (watch the video above for a visual demonstration).
  3. From here, swing up towards the fence with the edge, pronating just before contact.

This step integrates the backswing into your serve motion.

Step #6: Correct Racquet Back-Drop Test

To ensure you’re executing the backswing correctly:

  1. Stand about 2 feet from a fence with your back facing it.
  2. Get into the serve-ready position and practice shadow serves.
  3. Make sure the racket drops behind your back between your fingers and swings up without hitting the fence.

This drill provides immediate feedback on your technique.

Step #7: Full Serve Swing with Correct Technique

Finally, it’s time to put everything together into a full serve:

  1. Position yourself close to the service line.
  2. Hold a basket of balls nearby.
  3. Focus on the steps we practiced: trophy pose, drop the racket behind your back, swing up with the edge, pronate before contact, and follow through.

Perform this slowly, emphasizing each step to build muscle memory.

Final Tips

As you work on fixing your waiter’s serve, keep these tips in mind:

  • Be patient! Breaking old habits takes time and practice.
  • Consider having someone watch you to provide feedback on your technique.
  • Practice consistently to build confidence and improve your serve.

With dedication, you’ll develop a more powerful and effective serve in no time!

waiter's serve tennis fix

FAQ

What is the waiter’s serve in tennis?

The waiter’s serve is a common technical flaw where the racket face is open during the swing, leading to inconsistent contact with the ball.

How can I improve my serve grip?

To improve your serve grip, practice holding the racket with a continental grip and ensure the V between your thumb and index finger is positioned on the edge of the racket.

How often should I practice these drills?

Practice these drills regularly, aiming for at least two sessions each week to reinforce the correct technique and build muscle memory.

Where can I find more tennis drills and tips?

You can explore more tennis drills and tips at WebTennis24, a great resource for players and coaches alike.

Can I get personalized help with my serve?

Yes! Consider reaching out to a local coach or visiting the WebTennis24 Training for a vast collection of technique lessons, drills and tips to improve your serve!


Cosmin Miholca

Cosmin Miholca

Certified Tennis Coach

Ready to improve your tennis further?
Let’s get started!